This guide covers Free, Standard, Pro and Business. Each higher edition contains the features of the editions below it.
For quick answers, visit the FAQ. To browse by topic, return to the Help Center.
1. Getting started
What NoviDeck does
You manage the products you sell in Freemius. NoviDeck makes those products and offers available to its Elementor widgets. You can then design the way customers see them on your WordPress website.
Freemius remains the source of the product and checkout information. NoviDeck provides the WordPress administration and page-building tools described in this guide.
What you need
- A WordPress website with Elementor.
- The NoviDeck plugin.
- A Freemius product you are authorized to manage, if you want to display your own products and checkout offers.
- The required Freemius product API credentials for connecting your products.
- A NoviDeck license for the paid edition you want to use.
Elementor Pro is not required. Elementor itself is required.
Editions at a glance
| Edition | Total widgets | Additional features |
|---|---|---|
| Free | 2 | Purchase Button and Customer Portal |
| Standard | 10 | Eight product, price and selection widgets; Design administration |
| Pro | 15 | Five trial, coupon, upgrade, checkout and feature widgets; Commerce administration |
| Business | 20 | Five bundle, catalog, campaign and review widgets; Business administration |
2. Installation, activation and edition changes
Install NoviDeck
- Sign in to your WordPress administration area.
- Open the WordPress plugin installation screen.
- Upload the NoviDeck plugin ZIP and install it.
- Activate the plugin.
- For a paid edition, complete license activation through the Freemius dialog inside NoviDeck.
- Open the NoviDeck administration screen to begin connecting your products.
Which ZIP do I need?
- Free: Its own standalone plugin.
- Standard, Pro or Business: The single novideck-premium plugin package.
There are no separate Premium ZIPs for Standard, Pro and Business. The Freemius license unlocks the corresponding edition within the same Premium plugin.
Change your paid edition
- Open the Freemius license or plan controls available in NoviDeck.
- Change the license or plan to the paid edition you want.
- Confirm the active license in the Freemius dialog.
- Check that the features for your edition are available.
You do not need to replace the Premium plugin when changing between Standard, Pro and Business.
Your NoviDeck license is not the same thing as the API credentials used to connect the Freemius products you sell.
Upgrade from Free to Premium
- In WordPress, upload and activate the novideck-premium ZIP.
- During activation, Premium automatically deactivates the Free plugin.
- Your existing settings, connected products and Elementor pages remain available.
- Activate your paid license in the Freemius dialog.
- Do not reactivate the Free plugin.
Find the NoviDeck administration screens
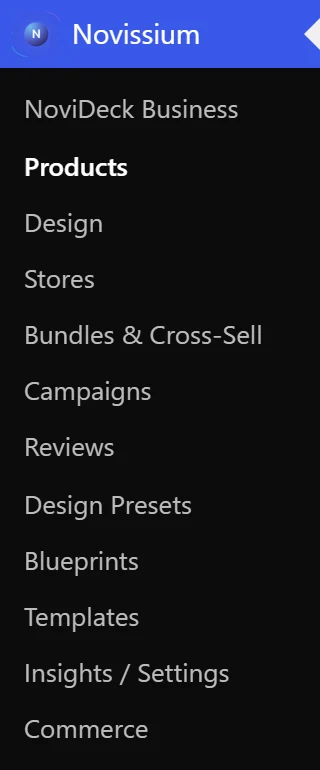
| Edition | WordPress administration |
|---|---|
| Free | Main menu NoviDeck |
| Standard | Main menu Novissium: NoviDeck (overview), Products and Design |
| Pro | Main menu Novissium: NoviDeck (overview), Products, Design and Commerce |
| Business | Main menu Novissium, with the additional Business sections described below |
From Pro onward, Commerce contains Checkout Profiles, Product Catalog, Events & Tracking and Customer Portal.
3. Connect your Freemius products
NoviDeck uses two separate kinds of Freemius information:
- Your NoviDeck license, which determines the features available in your installation.
- The API credentials for the Freemius products you sell, which allow those products to be connected.
Connect a product
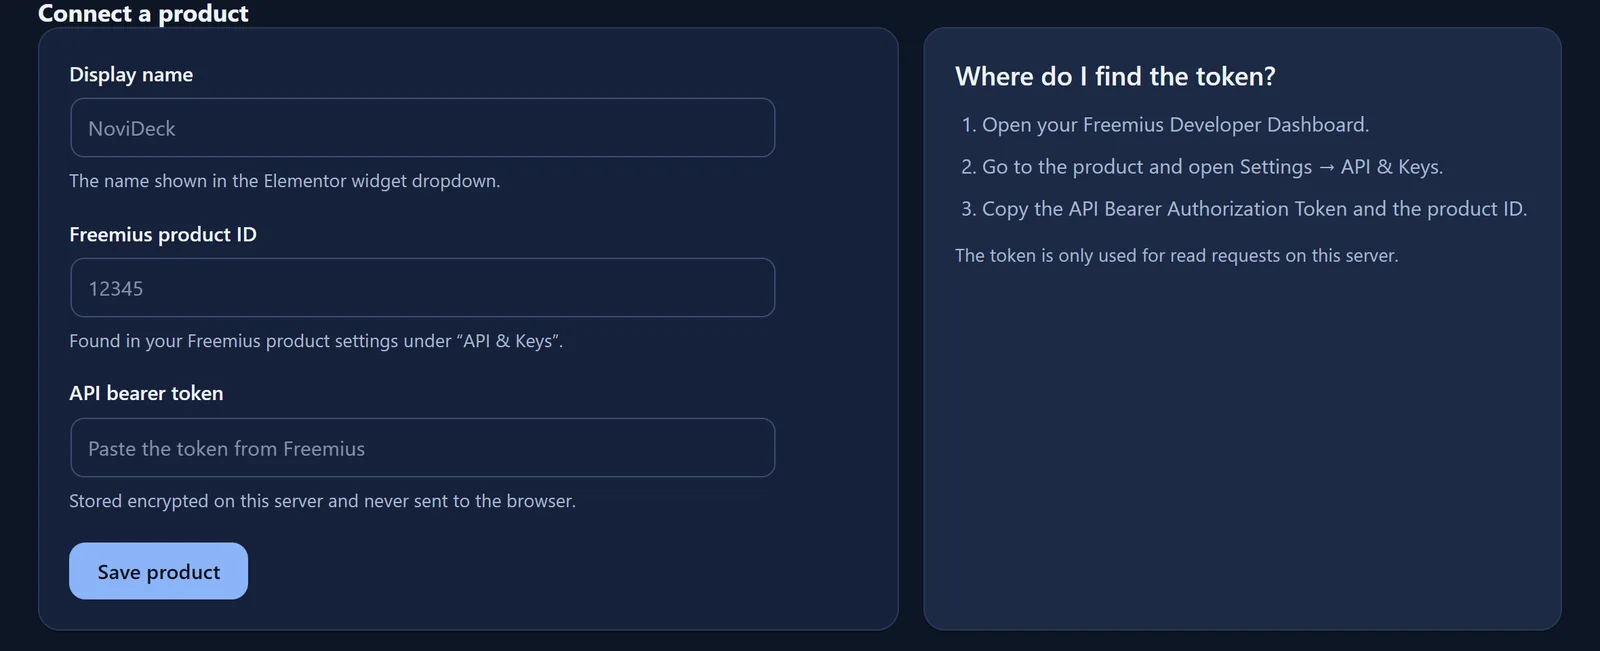
- In Freemius, open Developer Dashboard → your product → Settings → API & Keys.
- Copy the Freemius product ID and the API Bearer Authorization Token.
- In WordPress, open Novissium → Products (Premium) or the NoviDeck main menu (Free).
- Select the Add product tab.
- Enter Display name. This is the name shown in the Elementor product selection.
- Enter Freemius product ID and API bearer token.
- Click Save product.
- Open Products to check the connection and use the product in Elementor.
The API bearer token is stored encrypted on the server. It is used only for read requests and is never sent to the browser.
Products page and synchronization
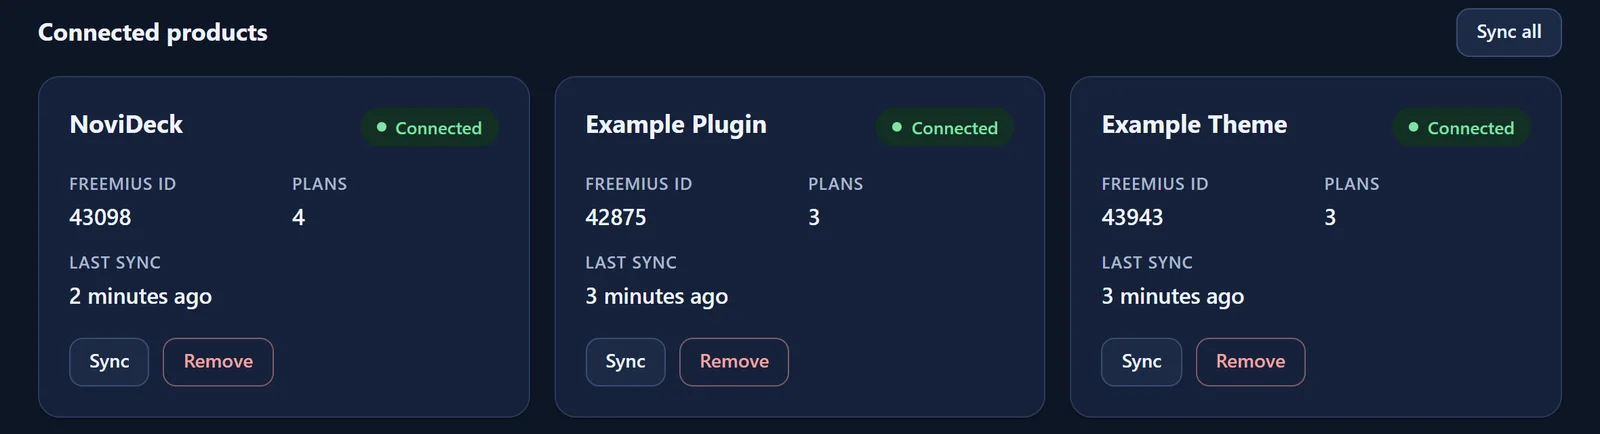
The Products page contains these tabs: Products, Add product, Templates, Data & privacy and Help.
- Connected products shows the status Connected, Incomplete or Error.
- Each product displays its Freemius ID, Plans and Last sync.
- Use Sync for an individual product or Sync all for the full list.
- Use Remove for an individual product when necessary.
- Under Data & privacy, you can find Delete all data on uninstall.
Previously saved widgets using manually entered product or plan IDs continue to work unchanged.
Business: connect a Store
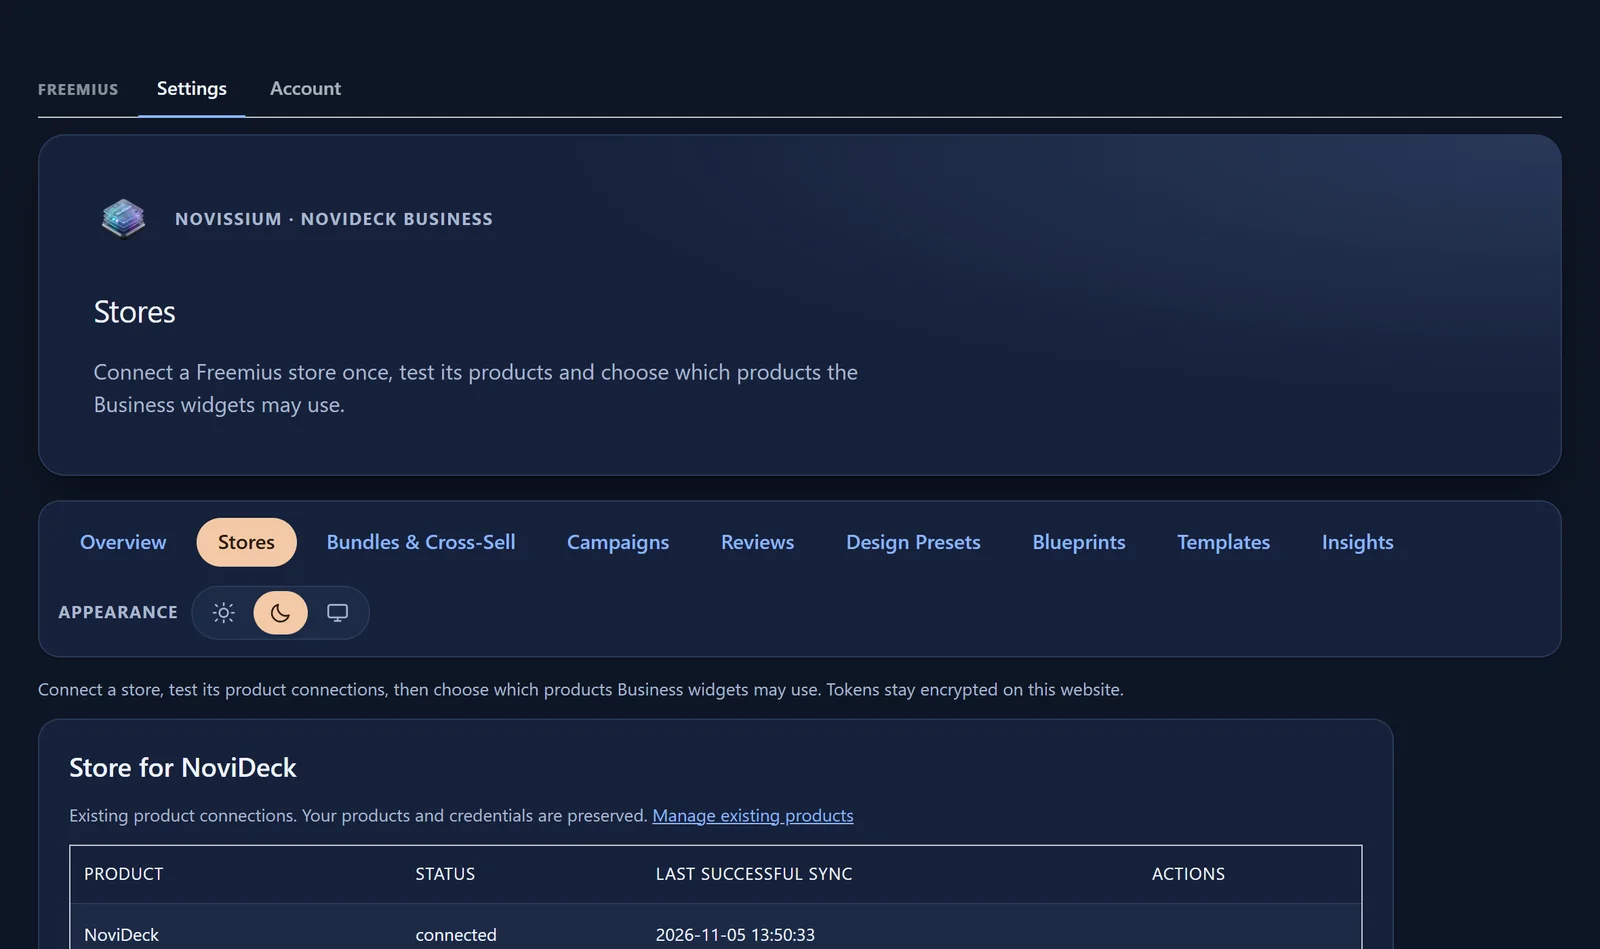
Business can connect Freemius Stores and their products.
- Open Novissium → Stores.
- Connect the Freemius Store using the available Store settings.
- Confirm that its products are available.
- Select the Store and relevant product or offer in a Business widget.
The Stores page also shows where a Store is used, including offers, campaigns, reviews and pages. For removal and restoration, see Stores.
Keep credentials private
Enter API credentials only in the appropriate administration fields. Do not place API tokens, passwords or license keys in Elementor text, public pages or support messages.
4. Understand products, plans and prices
| Term | Meaning |
|---|---|
| Store | A connected Freemius Store containing products. Used by Business. |
| Product | An item you sell through Freemius. |
| Plan | A specific offer or edition of that product. |
| Billing | The billing option of the offer. |
| Website count | The number of websites covered by the selected offer. |
| Currency | The currency offered for that combination in Freemius. |
| Checkout profile | A reusable checkout configuration in Pro Commerce. Business widgets can optionally use it. |
The Currency Selector only offers currencies configured in Freemius. It does not calculate exchange-rate conversions.
Business Bundle Offers use only combinations of price, currency, billing and website count that the Freemius API currently confirms. If no options appear, synchronize the product first.
5. Add your first widget in Elementor
- Open the WordPress page you want to edit in Elementor.
- Find the NoviDeck widget you want to use.
- Add it to the page.
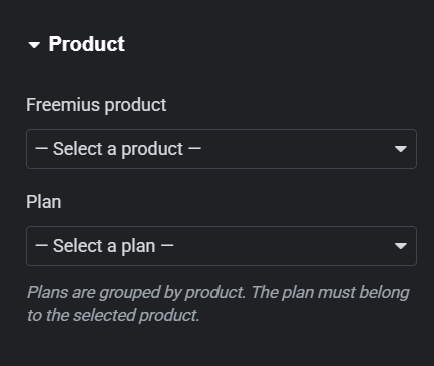
- Select the connected product and, where applicable, its plan or offer.
- Choose the content to display.
- Adjust the available widget styles.
- Preview the result on your page.
- Check that the selected product and checkout action match the offer you intend to present.
For your first page, start with a Purchase Button (Free or higher) or a Pricing Card (Standard or higher). Add selectors and other connected elements once the basic presentation works.
6. Free widgets
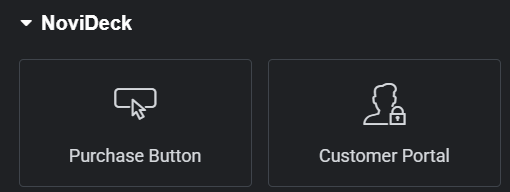
Free includes two widgets. Both are also available in Standard, Pro and Business.
Purchase Button

Use it for: A purchase action for a Freemius product and plan.
- Add Purchase Button in Elementor.
- Select the product and plan.
- Set the relevant billing option, website count and currency.
- Enter a group name if you want it connected to compatible selection controls.
- Adjust the button presentation.
- Preview the action with the selected offer.
Manual product and plan IDs are retained only for legacy use. For a new page, choose your connected product and plan.
Customer Portal
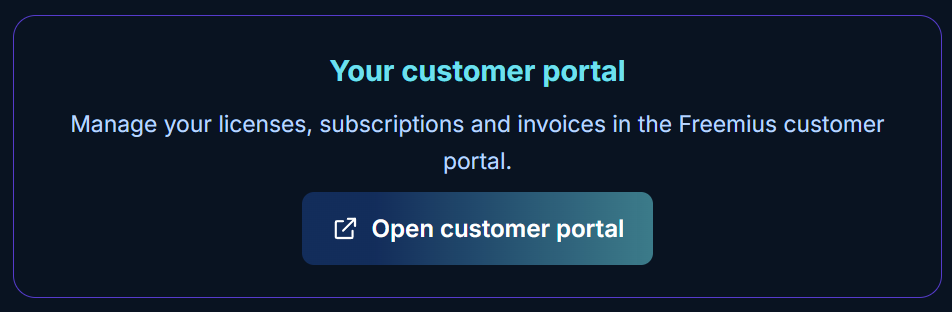
Use it for: A link or box leading to the Freemius customer portal.
- Add Customer Portal in Elementor.
- Select the relevant product.
- Configure the displayed link or box.
- Preview the customer-portal action.
This widget helps existing customers reach the Freemius customer portal. It is separate from a new purchase action.
7. Standard widgets
Standard adds eight widgets. They are also included in Pro and Business.
Pricing Card
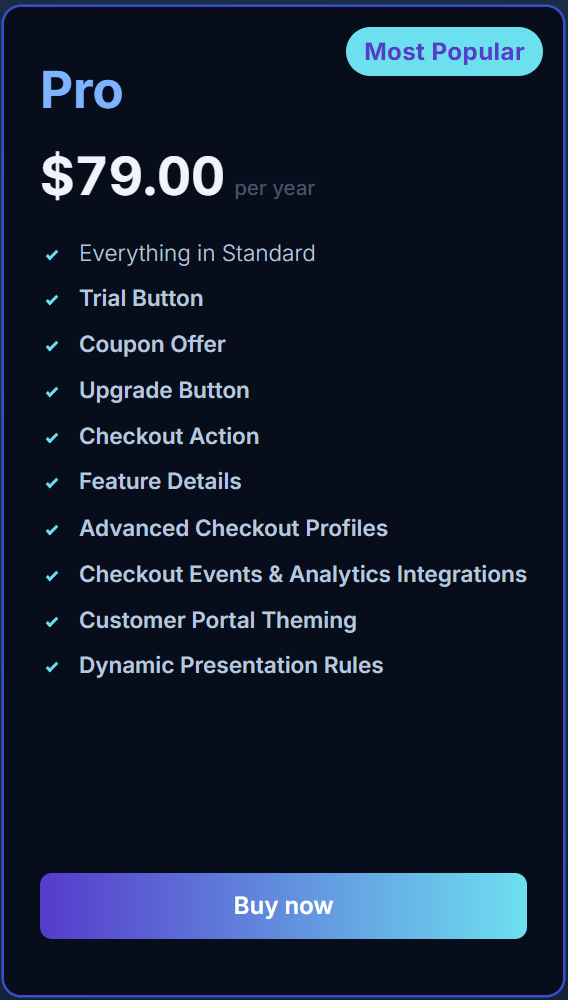
Use it for: Presenting one plan in a card.
- Add Pricing Card.
- Select the Freemius product and plan.
- Choose a Selection Group if this card should share selections with other widgets.
- Set the title, description and features. Features can come from Freemius or your own content.
- Configure Inherits features from if relevant.
- Choose whether to show a badge or highlight the card.
- Configure the price display, billing, website selection, currency and button.
- Adjust the card and element styles; then preview the result.
Pricing Table
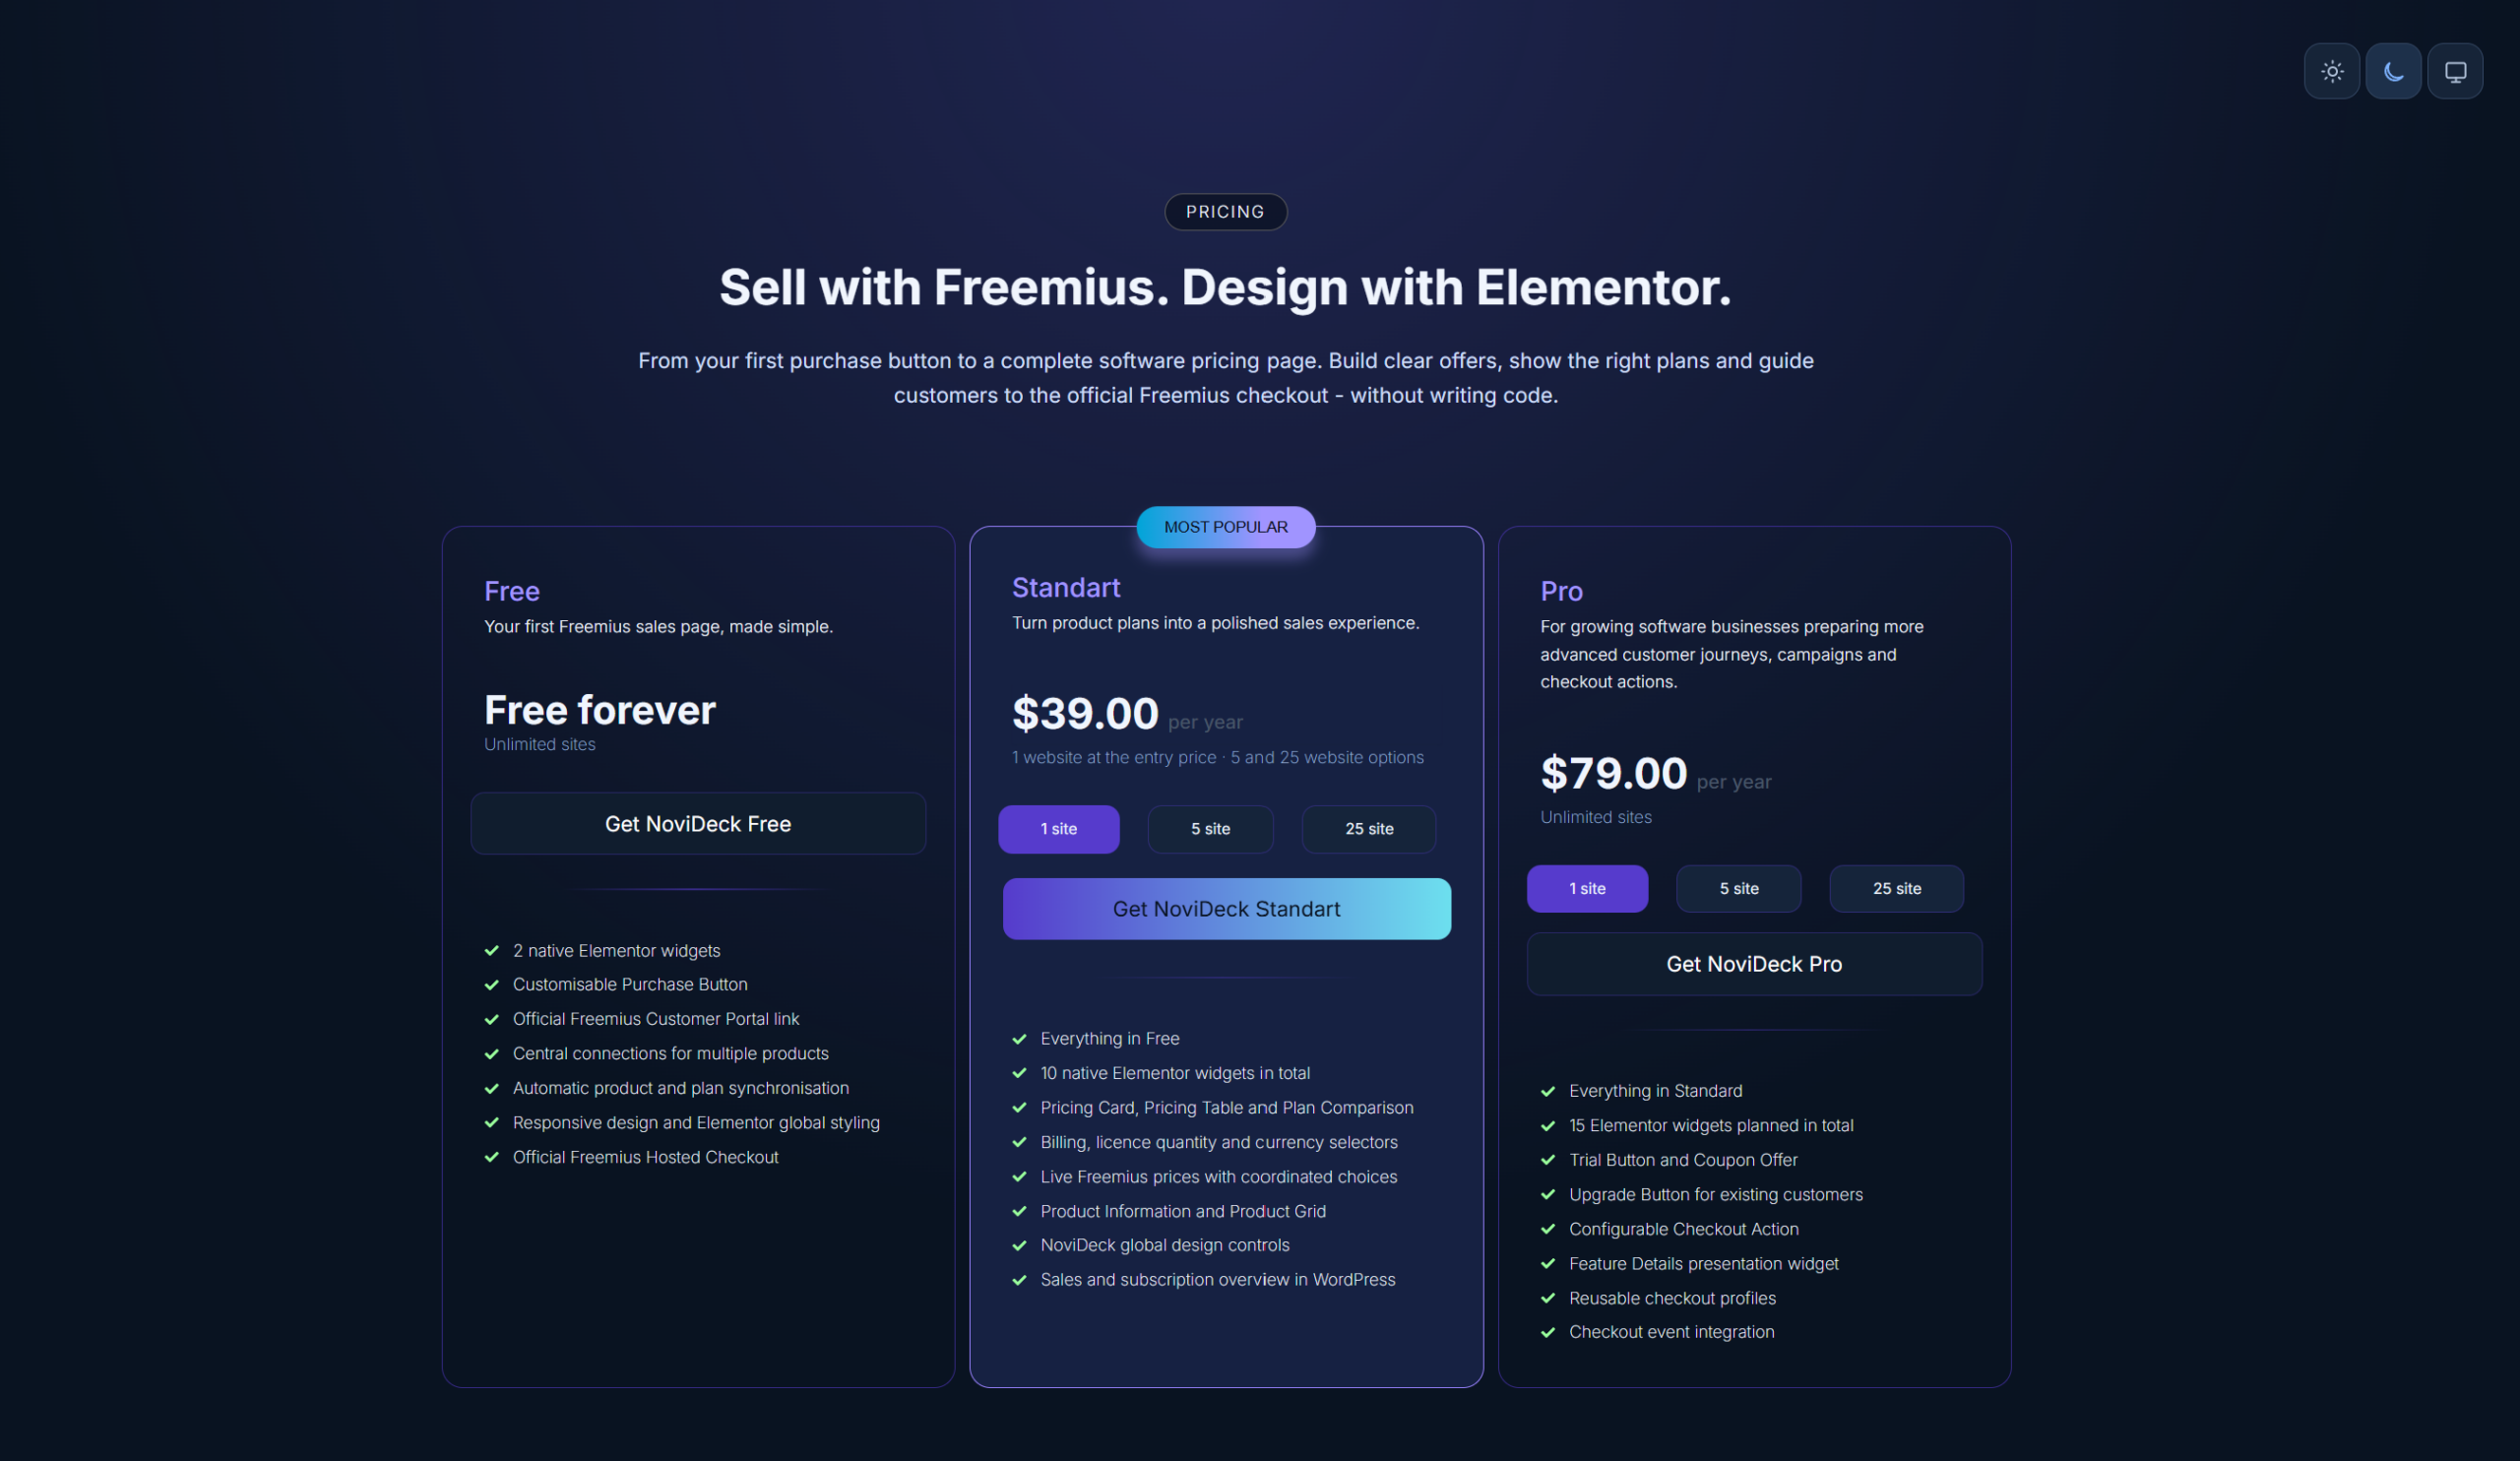
Use it for: Displaying several plans together.
- Add Pricing Table.
- Add the plans you want to display.
- Set the recommendation, badge, features and button text for each relevant plan.
- Configure the billing switcher, License Selector and currency as needed.
- Choose the number of columns.
- Preview the table at different screen widths.
Product Information
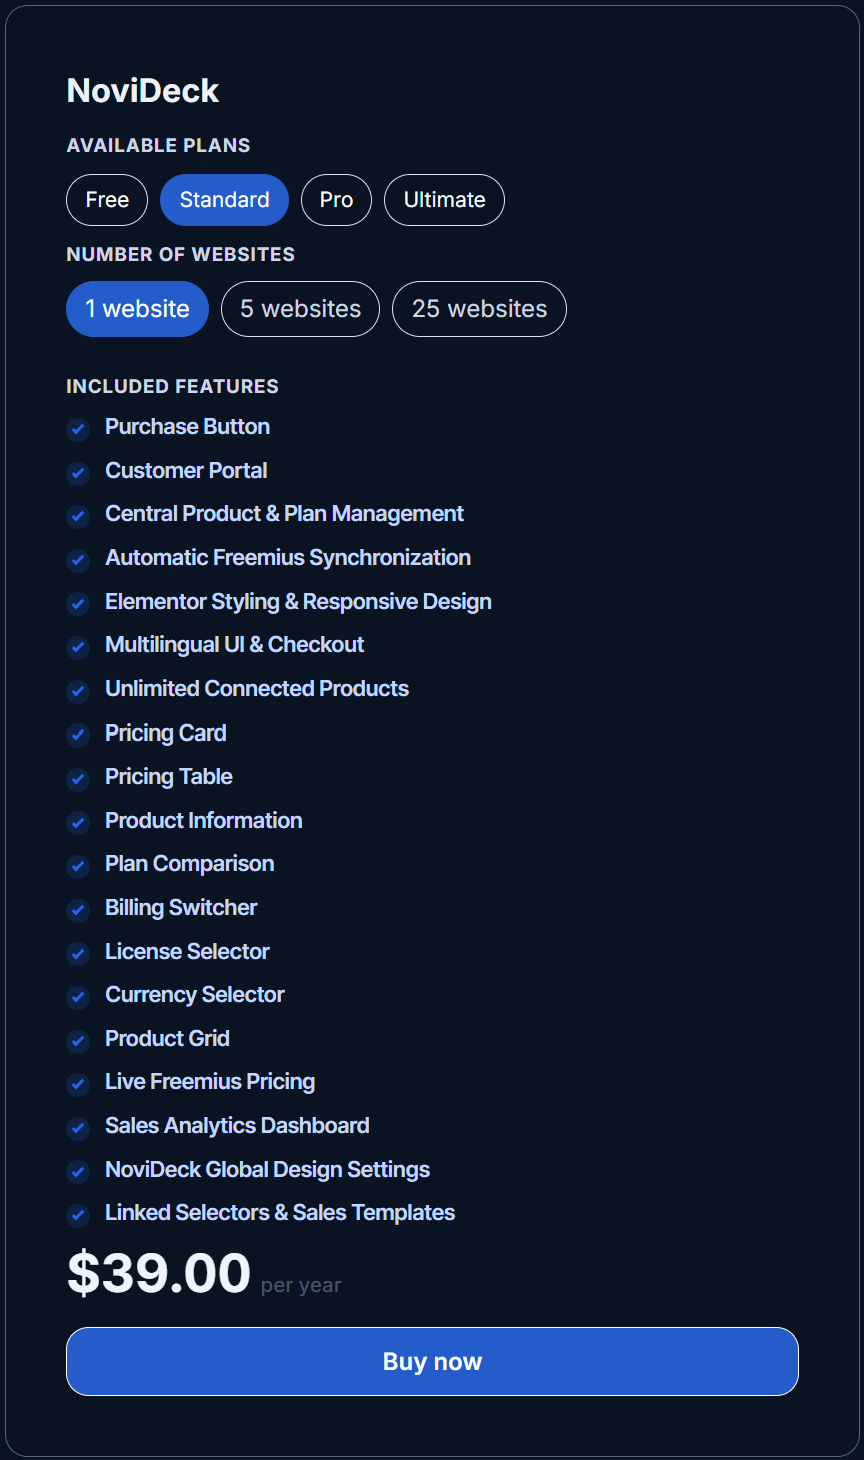
Use it for: Showing product details in an order you choose.
- Add Product Information.
- Select the product.
- Arrange the information blocks in the required order.
- Configure plan inheritance and website selection where relevant.
- Set the price and button presentation.
- Preview the content and the selected plan.
In Pro, Product Information can act as the Master of a Selection Group. See Selection Groups.
Plan Comparison
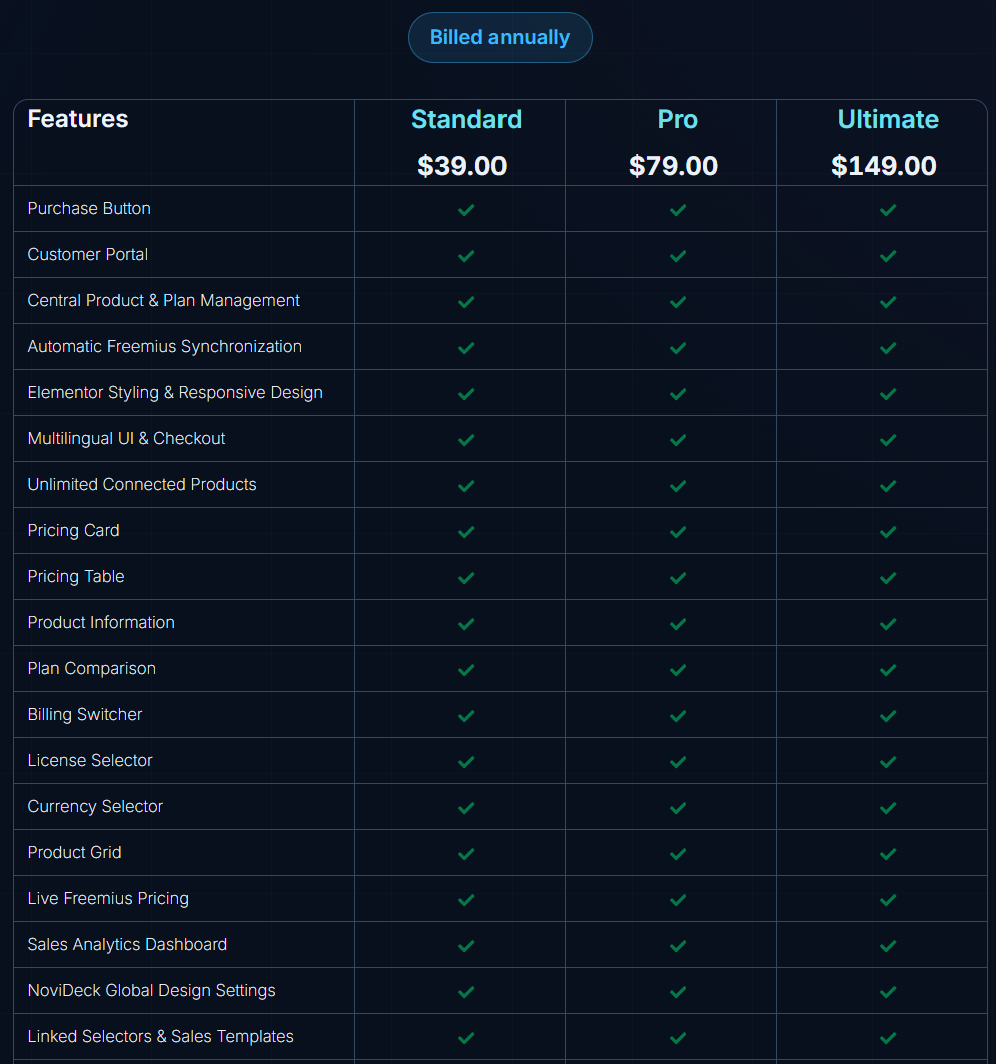
Use it for: Comparing plans and their features.
- Add Plan Comparison.
- Choose the plan columns.
- Set the comparison rows and sections using Freemius features or your own rows.
- Configure the symbols and optional tooltips.
- Set the price and button display.
- Add a billing switcher or License Selector if required.
- Preview the comparison.
Billing Switcher
Use it for: Letting visitors select a billing option.
- Add Billing Switcher.
- Configure the available billing options.
- Use the same group name as the widgets it should control.
- Test the selection with the connected display.
License Selector
Use it for: Selecting a website quantity for an offer.
- Add License Selector.
- Configure the quantity choices.
- Use the same group name as the relevant price or checkout widget.
- Check the result for each offered quantity.
Currency Selector
Use it for: Selecting a currency offered through Freemius.
- Add Currency Selector.
- Configure the available currencies.
- Use the same group name as the related widgets.
- Check the selected offer after switching.
Note: This widget does not convert prices. It uses currencies actually offered in Freemius.
Product Grid
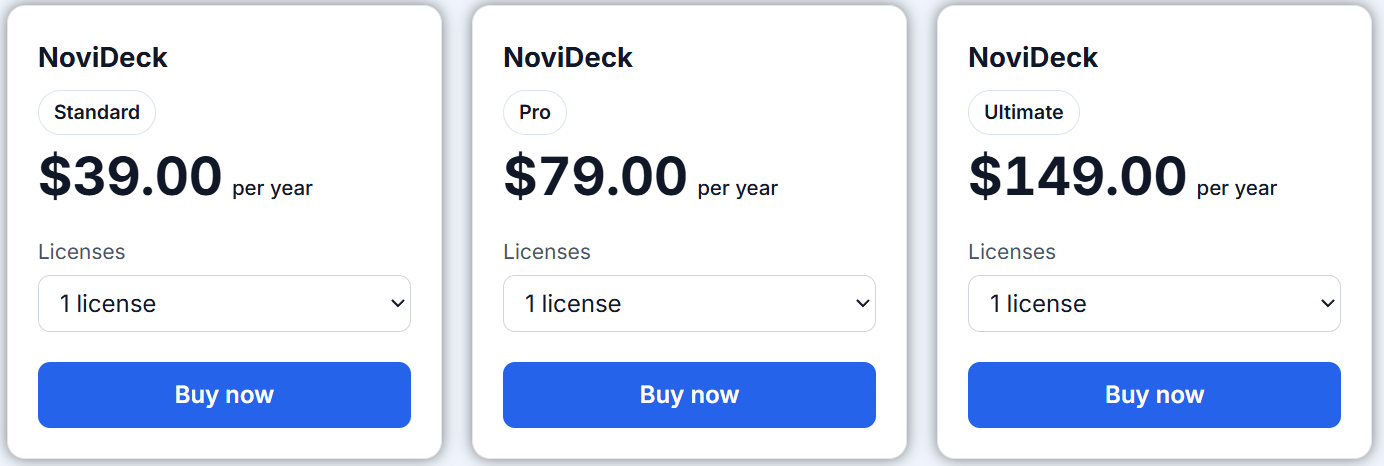
Use it for: Showing several products as a grid.
- Add Product Grid.
- Choose the products to display.
- Add product images in Elementor. Images do not come from Freemius.
- Set the plan used for each price and button.
- Configure product detail-page links and any highlighted products.
- Preview the grid and its links.
8. Pro widgets
Pro adds five widgets. They are also included in Business.
Common Pro controls
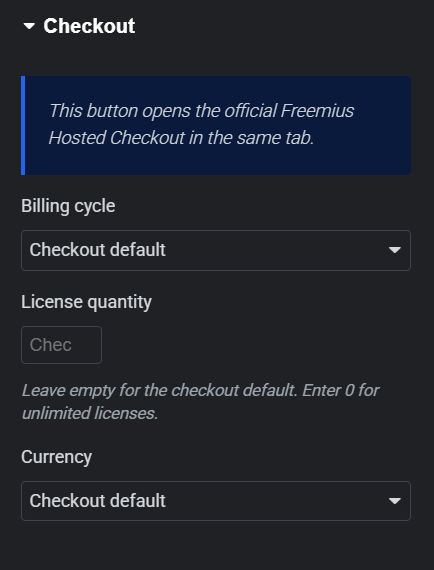
The Product and checkout section includes Checkout profile, Override permitted profile values, Freemius product, Plan and Group name.
The content controls include Heading, Description, Button text, Show heading, Show description, Show button, and Conditions text / Show conditions.
For action widgets, Action layout supports Button, Text link, Icon button and Full-width action. An icon can appear Before text or After text.
Pro widgets also include styling controls for typography, colors, hover and focus states, spacing and border radius.
Trial Button

Use it for: A trial-related action.
- Add Trial Button.
- Select the product and plan under Product and checkout.
- Configure the available trial and checkout values.
- Style the Start trial button.
- Check the trial details and checkout.
The widget tells visitors “Payment details required.” or “No payment details required.”, according to the trial offer.
Coupon Offer
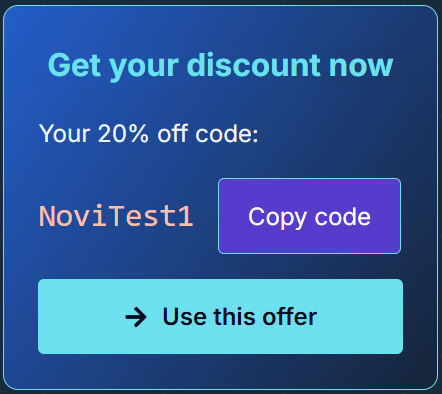
Use it for: Presenting a coupon-related offer.
- Add Coupon Offer.
- Select the product and plan under Product and checkout.
- Set Coupon mode to Promotional offer or Offer or enter a coupon.
- Choose Show coupon code and Show copy button as needed.
- Choose the Offer layout: Block or Compact.
- Edit the text for Coupon Code, Enter your own coupon code and Enter your code.
- Position the action buttons Below input or Beside input.
- Preview the coupon and test the checkout.
The widget provides Use Code, Remove Code and Copy code actions.
Upgrade Button
Use it for: Directing customers to their Freemius account to manage upgrades.
- Add Upgrade Button.
- Configure the relevant available fields and presentation.
- Preview the Manage upgrades button.
Manage upgrades opens the Freemius customer account.
Checkout Action
Use it for: A checkout action using a saved Checkout profile.
- Add Checkout Action.
- Select the Checkout profile saved in Commerce.
- Configure Override permitted profile values only where the profile permits overrides.
- Adjust the other available content and style controls.
- Preview the Continue to checkout button.
Feature Details
Use it for: Presenting more detailed information about a plan’s features.
- Add Feature Details.
- Select the relevant product and plan.
- Under Selected features, choose specific features or leave the selection empty to show all confirmed features of the plan.
- Optionally enable Show included previous edition, with the text Everything in {plan}.
- Choose List, Cards or Accordion and configure the columns.
- Choose Show feature values, Show feature descriptions and Show feature icons as needed.
- For individual features, configure Feature ID, Category, Custom title and Additional explanation.
- Use a Selection Group if the displayed plan should follow a Pro master.
- Preview the Included and Not included states.
9. Selection Groups and Master/Follower
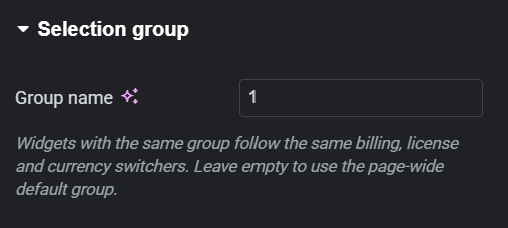
Standard selectors can control compatible widgets through a shared group name. This includes the Billing Switcher, License Selector and Currency Selector.
Connect a set of Standard widgets
- Add a selector and a compatible product, price or checkout widget.
- Enter the same group name in the relevant widgets.
- Configure the product and offer information.
- Preview the page and change the selection.
- Check that the related widgets respond as intended.
Use a Pro master
In Pro, Product Information can serve as the master of a Selection Group. Compatible follower widgets use the active selection from that master.
- Add Product Information.
- Configure it as the master of a named group.
- Add the compatible widgets that should follow that group.
- Give the followers the same group name and the appropriate follower setting.
- Test the connected selection on the page.
Business widgets use their own independent Source settings. They do not change how Pro Master/Follower groups work.
10. Pro Commerce administration
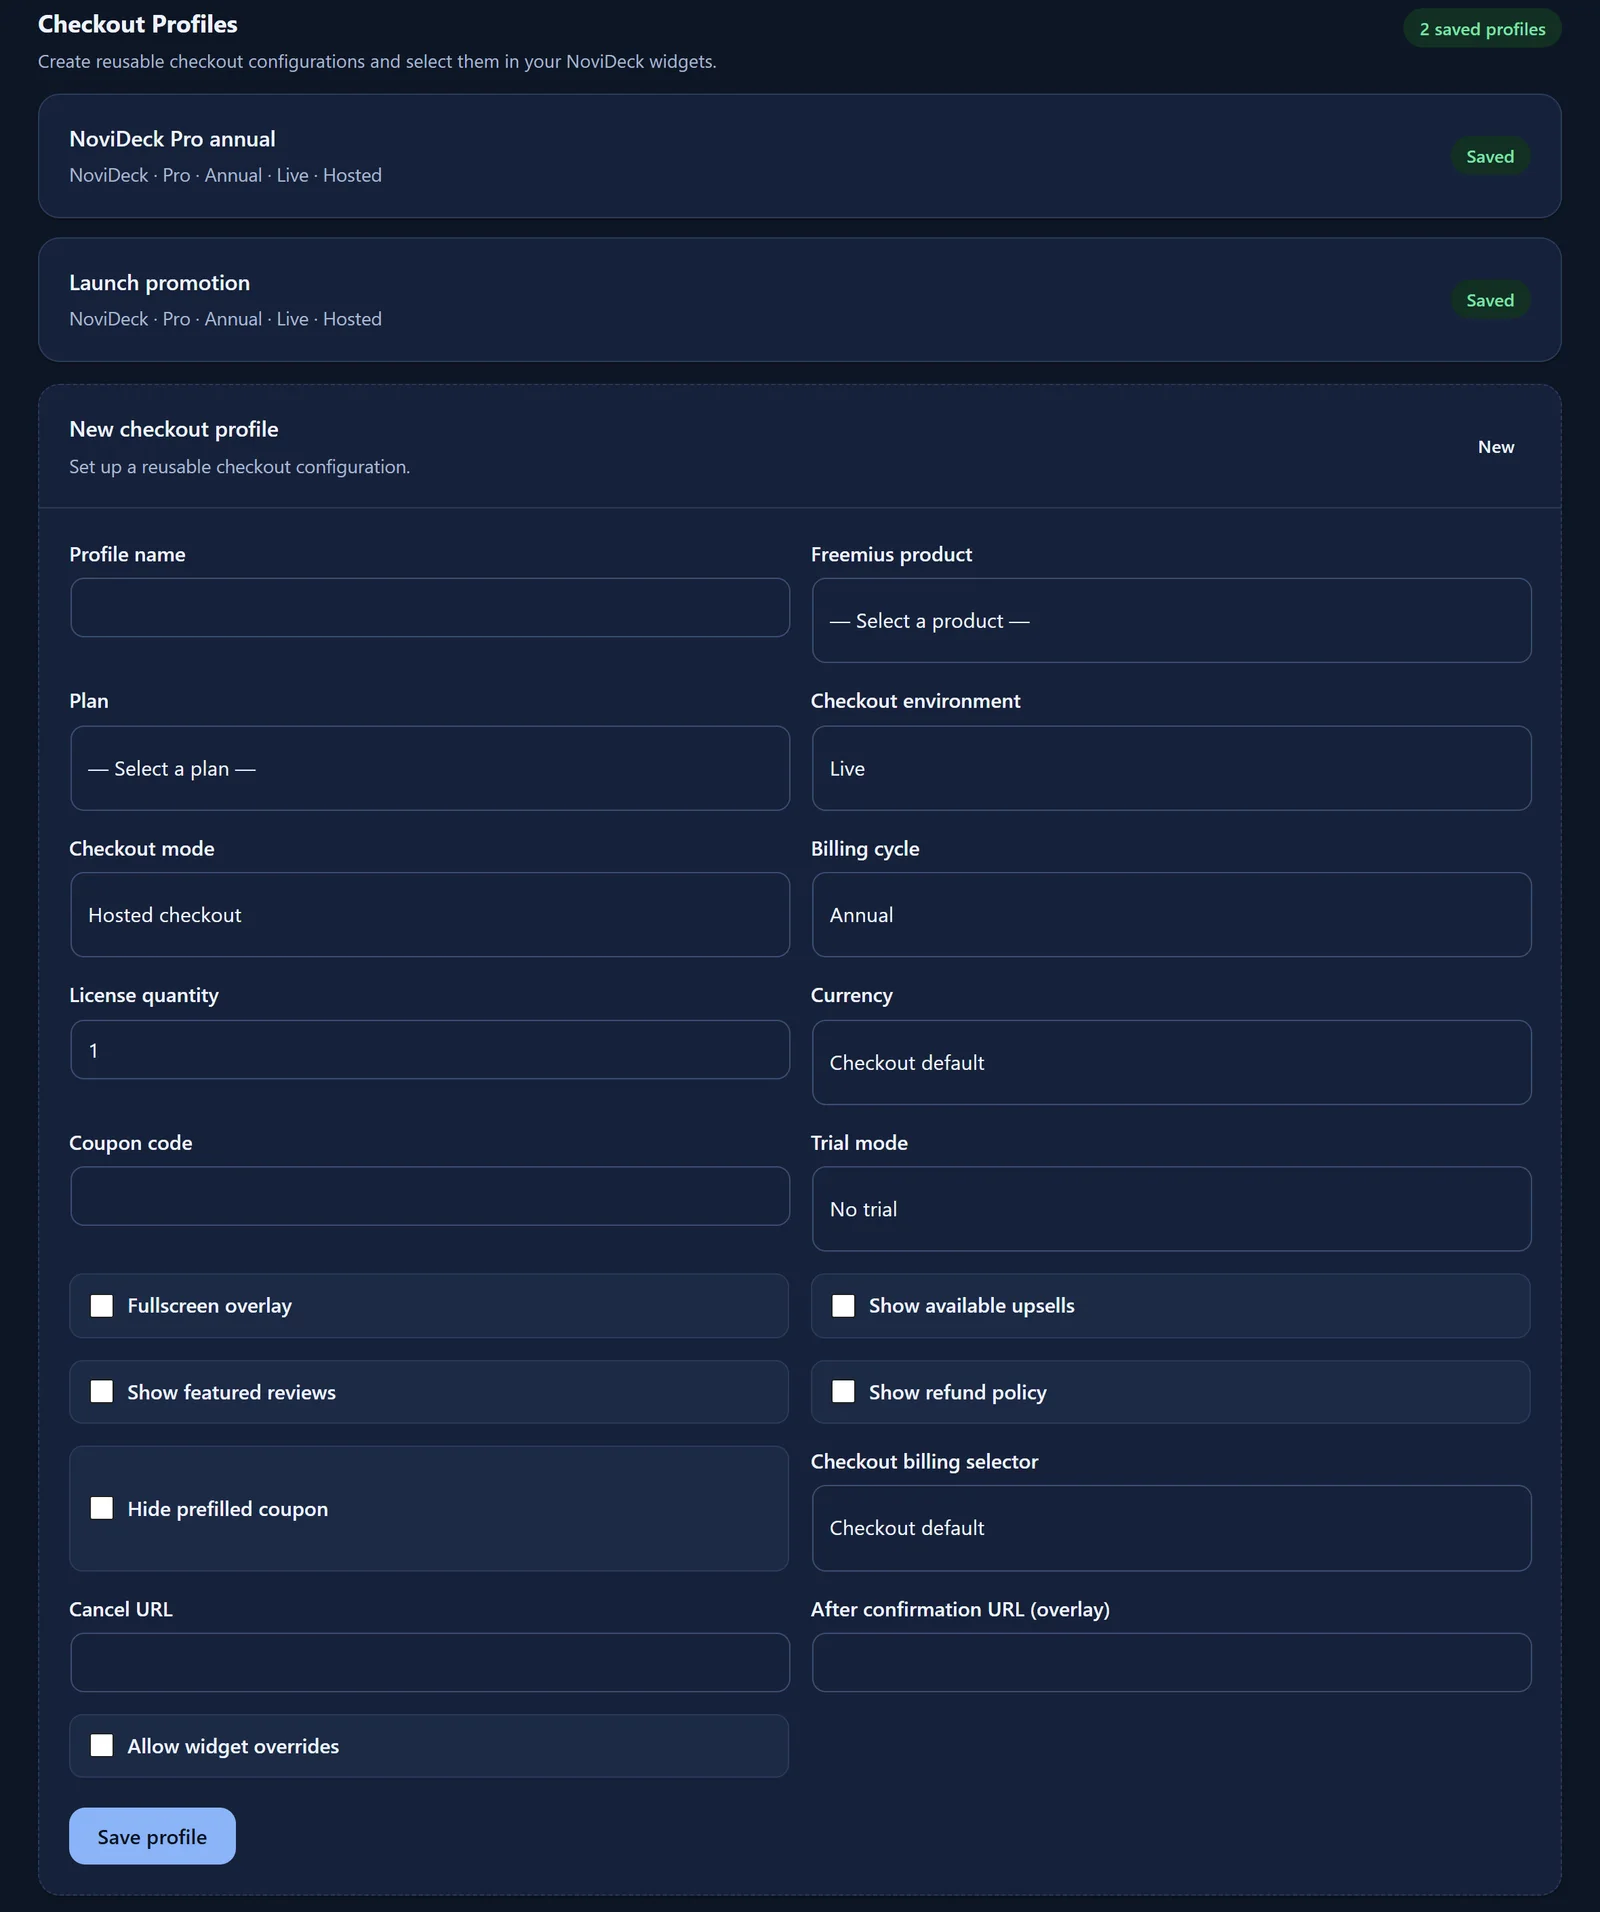
Pro adds Commerce under the Novissium main menu. It contains four sections:
- Checkout Profiles: Checkout configurations that can be selected in supported widgets.
- Product Catalog: The product catalog used by the Commerce tools.
- Events & Tracking: Commerce event and tracking settings.
- Customer Portal: Customer-portal settings.
Business widgets can optionally select a Checkout profile from Commerce. See Business Sources and Checkout profiles.
11. Business widgets
Business adds five widgets, bringing the total to 20.
Common Source and checkout settings
Business widgets have their own Source settings. These do not depend on the Pro Selection Group master.
- Add a Business widget.
- Under Source, select the Store and the relevant product or offer.
- Optionally choose a Checkout profile from Commerce.
- If you want to keep the selection made in the widget, use the option to retain the widget selection.
- Make sure the Checkout profile allows widget overrides. The profile then supplies checkout-opening behavior, such as coupon, overlay and display options.
- Preview the resulting offer and checkout.
Bundle Offer
Use it for: Displaying a stored bundle offer.
- Create or select a bundle in Bundles & Cross-Sell.
- Add Bundle Offer in Elementor.
- Select the stored offer in Source.
- Configure its edition, website count and billing presentation.
- Optionally turn on Show savings.
- Style and preview the widget.
Cross-Sell Offer
Use it for: Recommending additional products.
- Add Cross-Sell Offer.
- Choose the relevant Source information.
- Exclude products you do not want recommended.
- Set the maximum number of recommendations.
- Configure product labels.
- Preview the recommendations.
Portfolio Catalog
Use it for: A searchable, filterable catalog of products from one Store.
- Add Portfolio Catalog.
- Select the Store under Source.
- Configure search and filters.
- Set the products per page.
- Customize the catalog layout and its search/filter styles.
- Test the search field, filters and pagination in the page preview.
Campaign Banner
Use it for: Presenting a saved campaign.
- Create or select a campaign in Campaigns.
- Add Campaign Banner.
- Select the saved campaign.
- Choose the banner layout.
- Optionally add an image or icon.
- Use the campaign-phase preview in Elementor and check the result.
Verified Reviews
Use it for: Displaying published reviews for a product.
- Add Verified Reviews.
- Select the product.
- Choose the layout.
- Optionally limit the display to currently verified license holders.
- Set the minimum rating, maximum number of reviews and excerpt length.
- Preview the published reviews.
The verified label has specific requirements. See Reviews.
12. Styling Business widgets
Business widgets support layout, container, element and button styles.
Apply an optional Design Preset
- Select the Business widget in Elementor.
- Choose an available Design Preset, if desired.
- Set the Color mode to light or dark.
- Adjust the widget’s own styles as needed.
- Preview the result.
The order of precedence is:
- Widget settings take priority.
- The Design Preset provides optional fallback values.
- Elementor global values provide the foundation.
Portfolio Catalog: Search and filters
The Portfolio Catalog has additional Search and filters styles for spacing and labels. You can style the search field and dropdown background, border, radius, padding, width and focus color.
The browser controls hover colors in an open dropdown list. This part is not controlled by the widget’s styling options.
13. Business administration
Business uses the Novissium main menu. Its sections are:
NoviDeck Business, Products, Stores, Bundles & Cross-Sell, Campaigns, Design Presets, Blueprints, Templates, Reviews, Insights / Settings.
Stores
Use Stores to connect Freemius Stores and their products.
- Open Novissium → Stores.
- Select or connect the Store you want to manage.
- Review where it is used: offers, campaigns, reviews and pages.
- If you remove a Store from Business, its products under Products and its Standard/Pro widgets remain unchanged.
- A removed Store can be restored later. Permanent deletion also removes the stored API tokens from this website.
Review Store usage before removing it. Permanent deletion and ordinary removal do not have the same effect.
Bundles & Cross-Sell
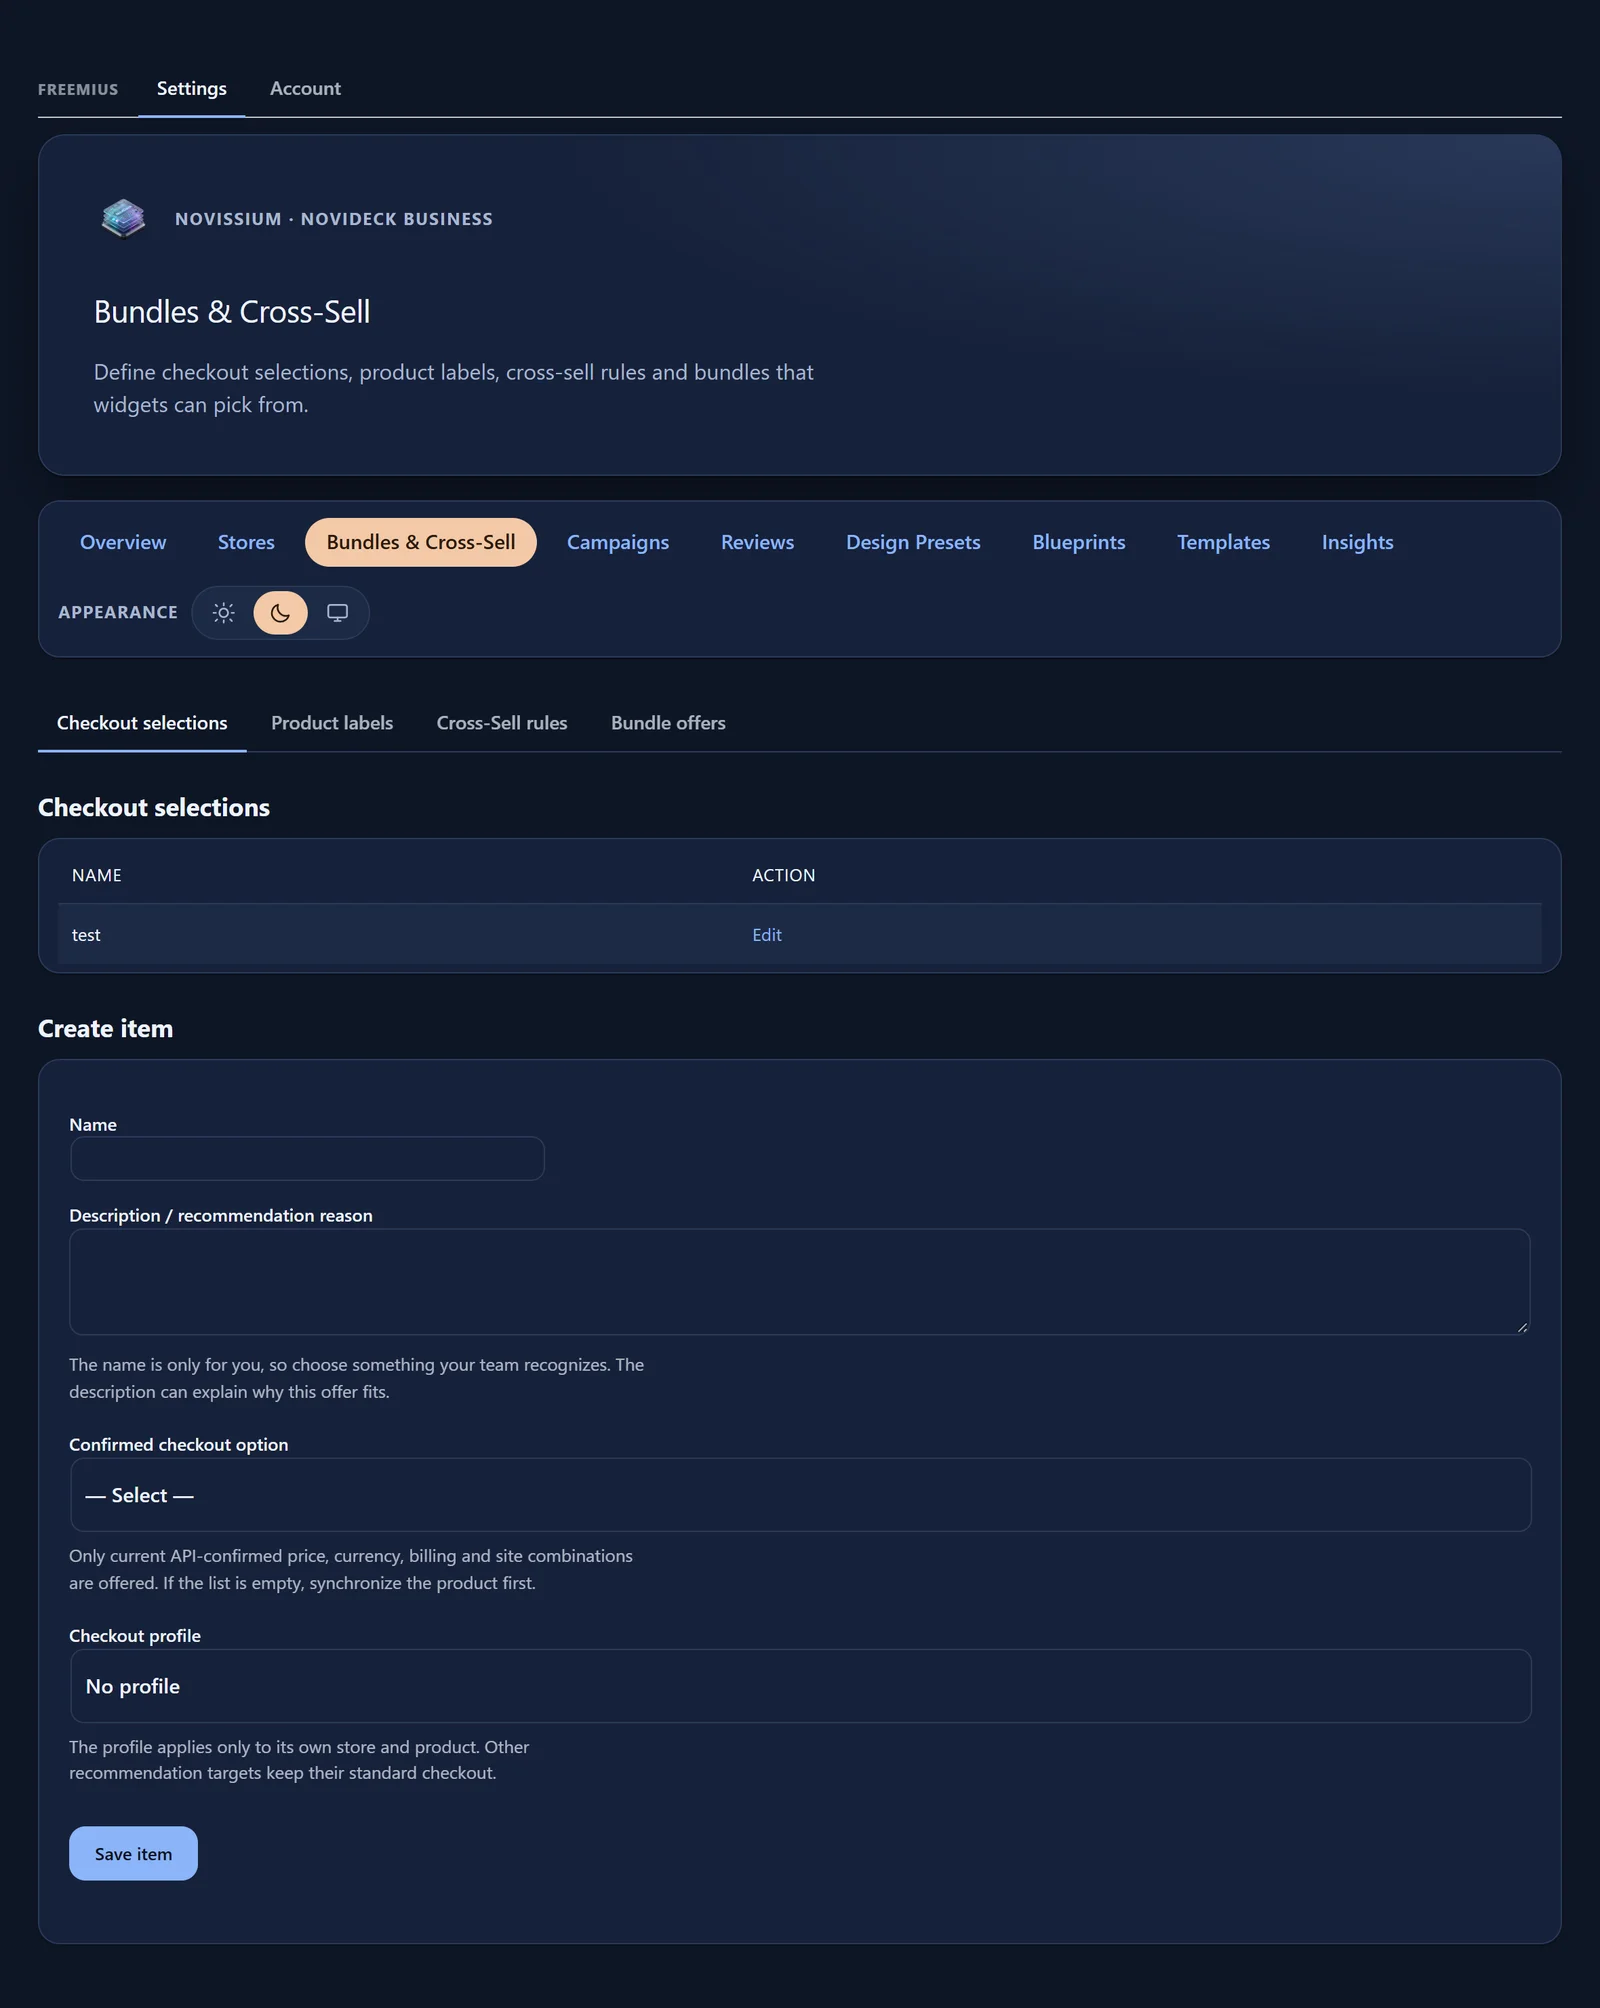
This section manages bundle offers and cross-sell recommendations.
Create a bundle offer:
- Open Novissium → Bundles & Cross-Sell.
- Create a bundle offer.
- Assign it to a real Freemius bundle product and plan from the synchronized Store.
- Select from the combinations currently confirmed by the Freemius API: price, currency, billing and website count.
- Save the offer and use it in Bundle Offer.
If no combinations are listed, synchronize the product first.
Cross-sell offers recommend additional products. Configure the recommendation in this section and present it with Cross-Sell Offer.
Campaigns
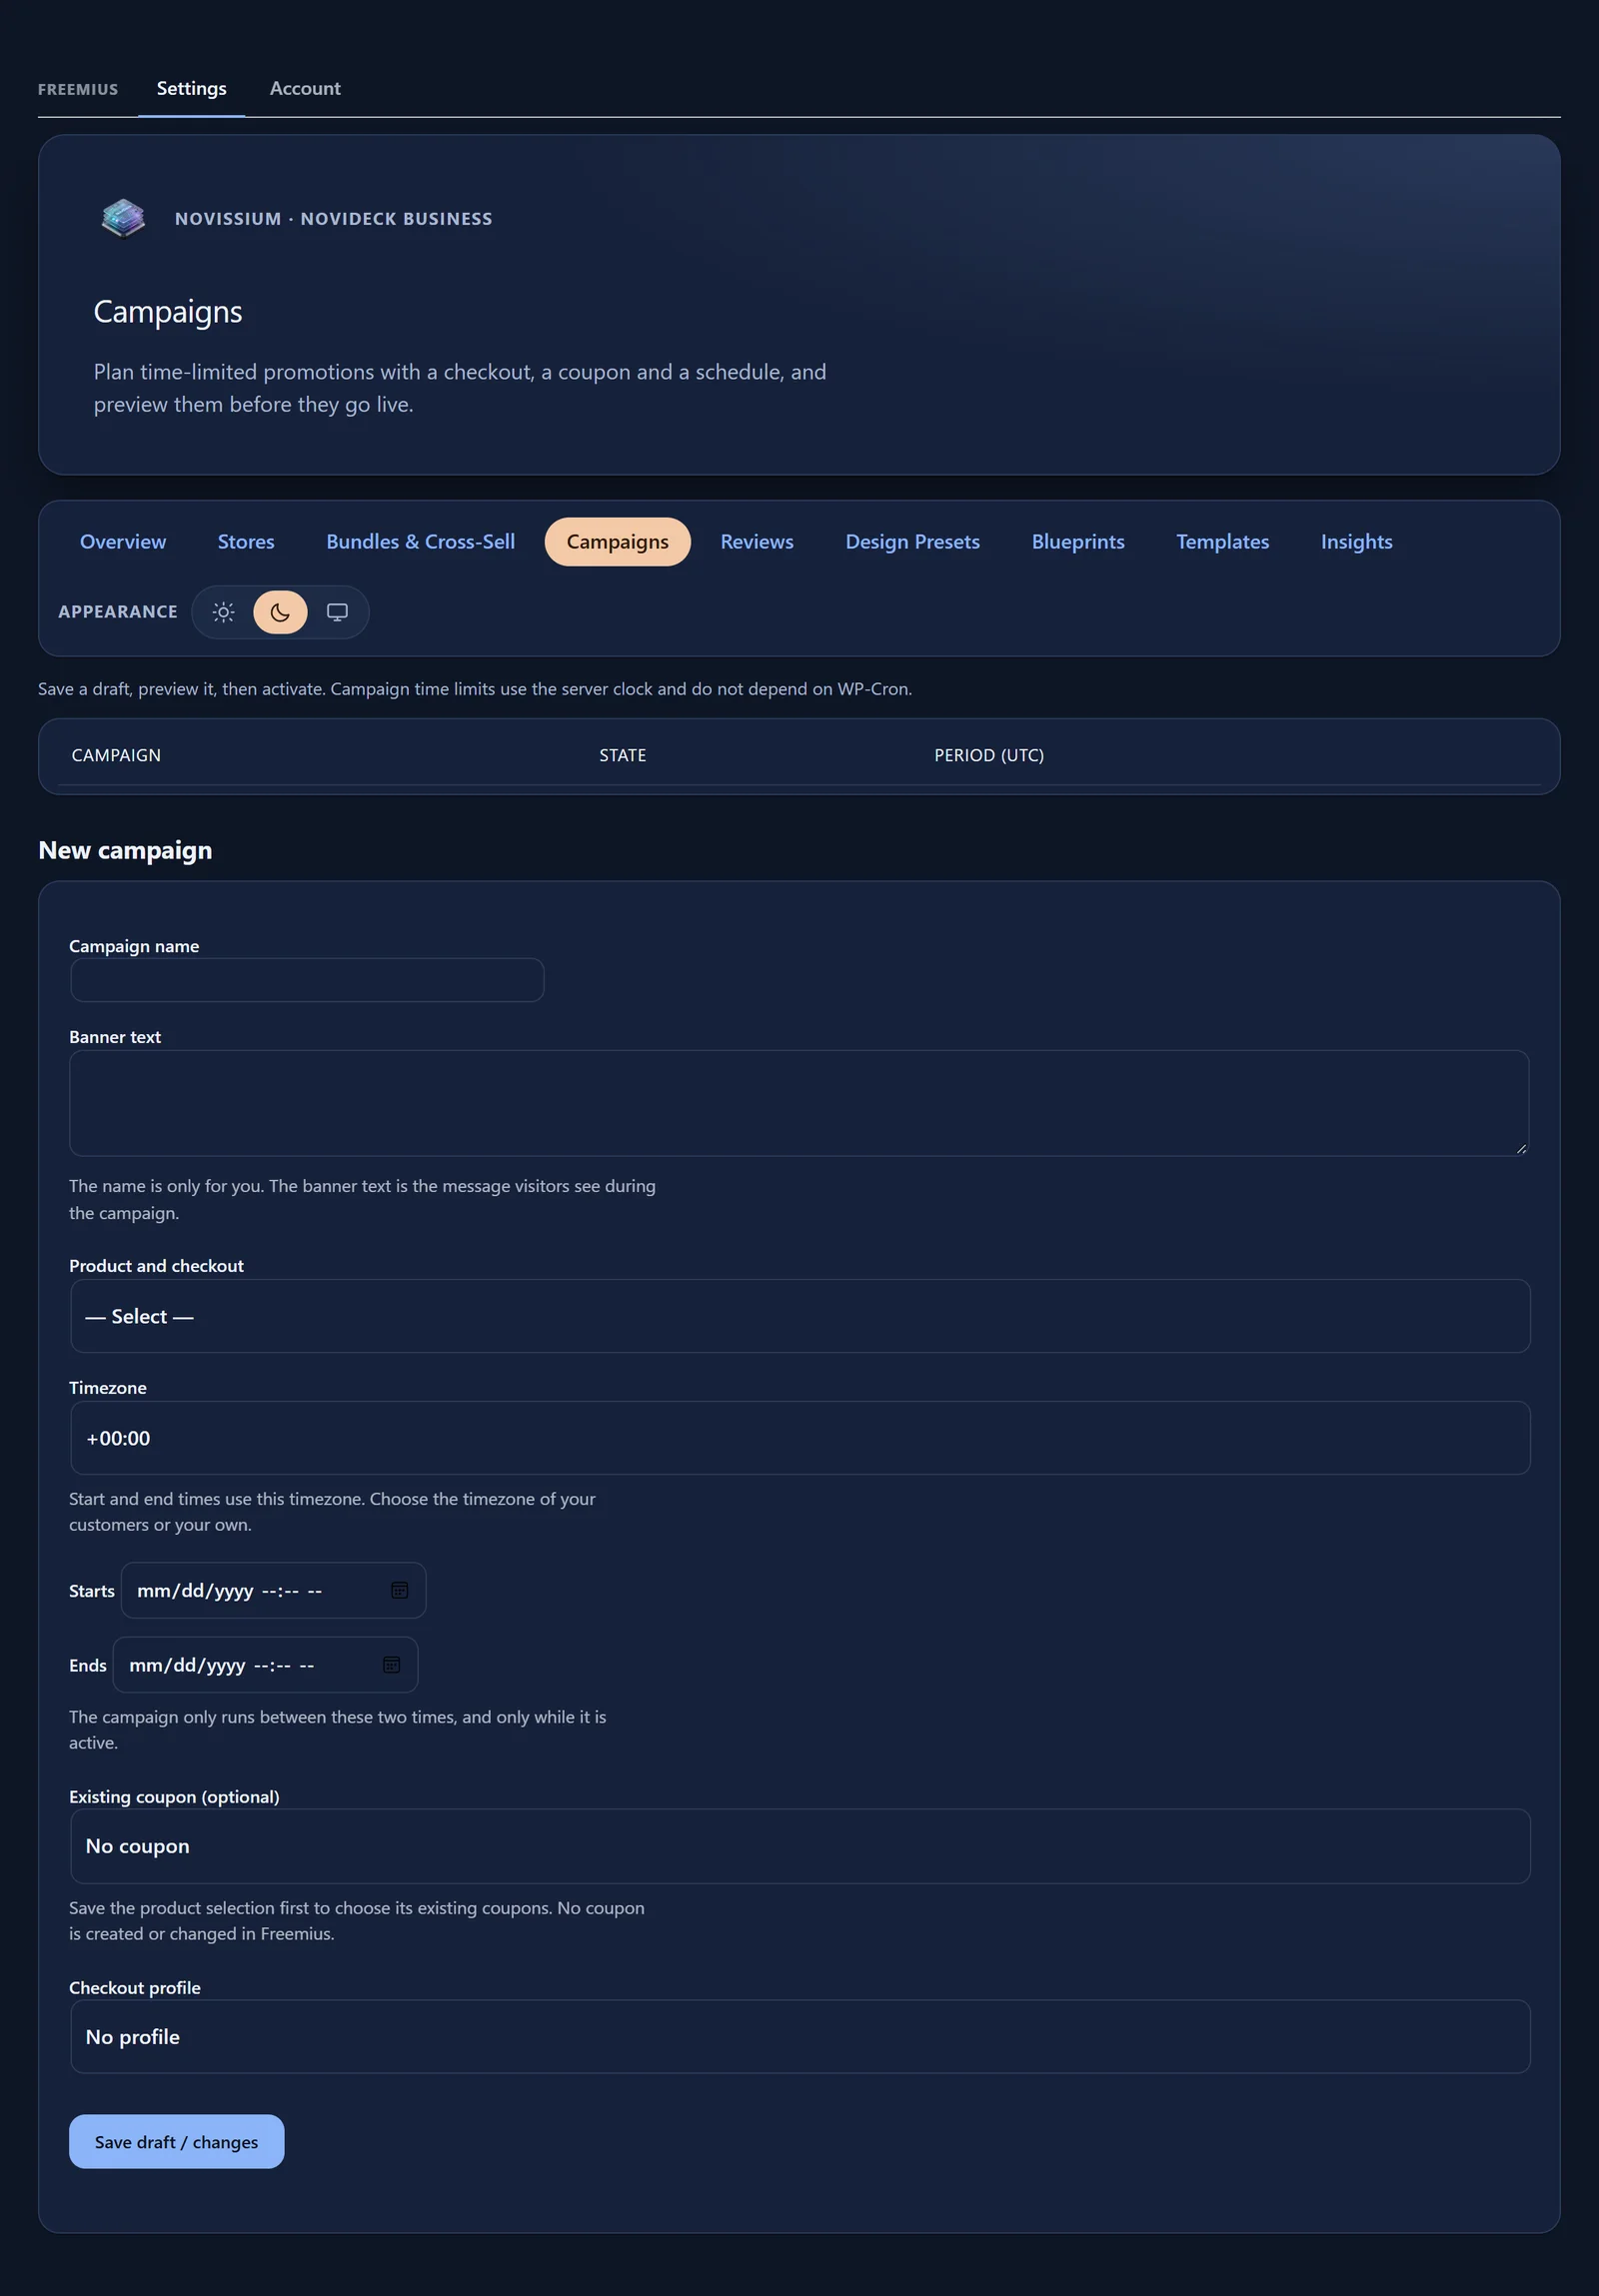
Use Campaigns for time-limited promotions with checkout and coupons.
- Open Novissium → Campaigns.
- Configure the campaign and its time limits.
- Save it as a draft.
- Review the preview.
- Activate the campaign when ready.
Campaign time boundaries use server time and do not depend on WP-Cron. Ambiguous times during the daylight-saving time change are rejected. Enter those times in UTC instead.
Design Presets
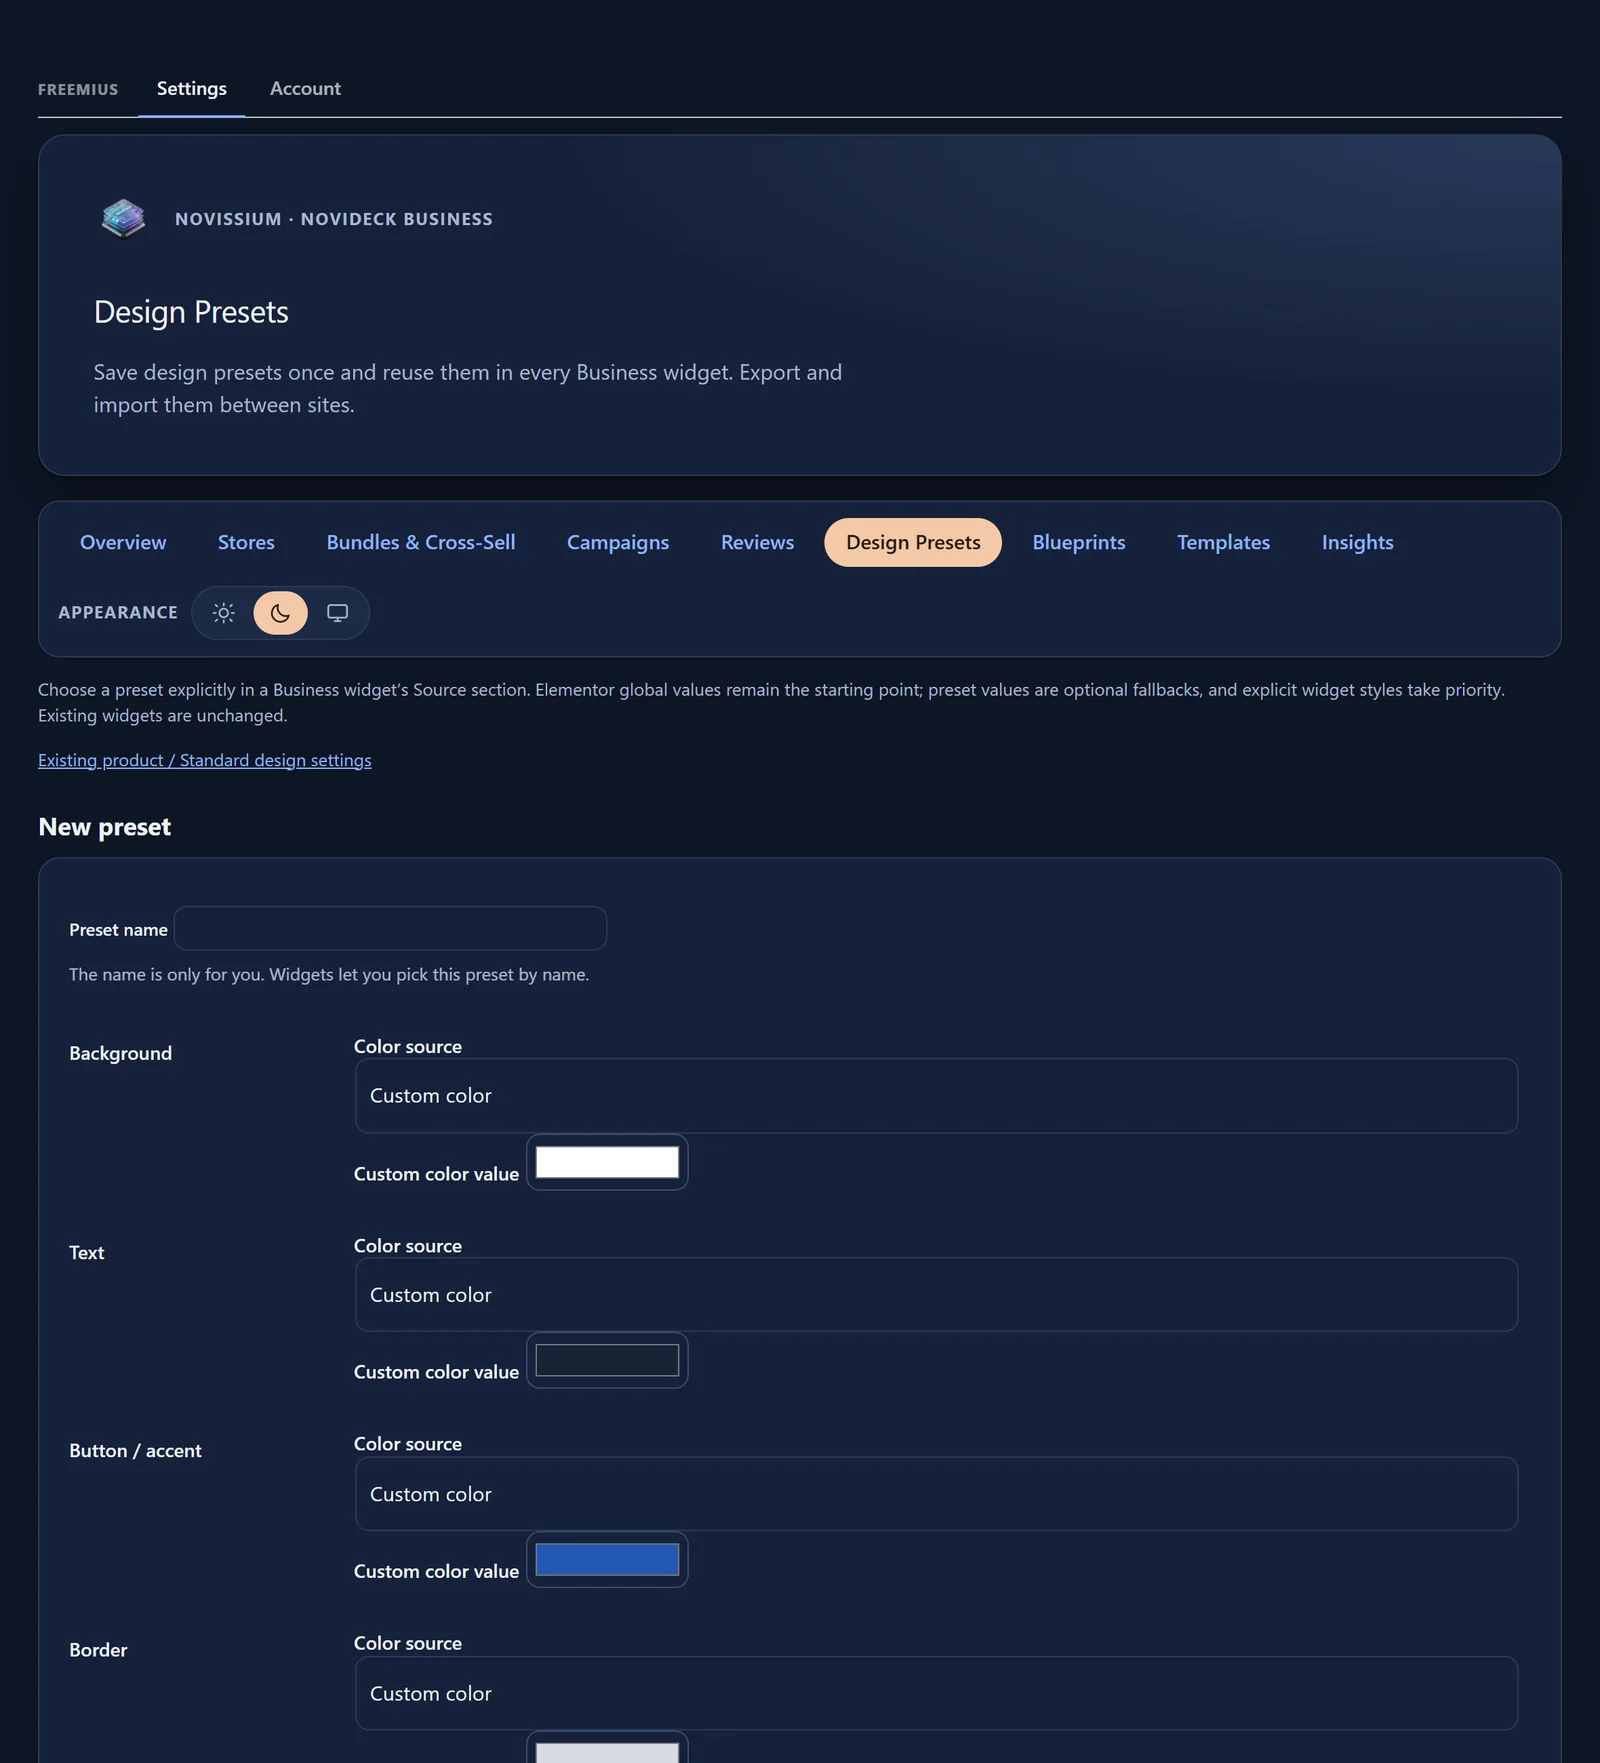
Design Presets let you reuse visual settings across Business widgets.
- Open Novissium → Design Presets.
- Configure the design values.
- Check the light and dark color modes.
- Save the preset.
- Select it in the relevant Business widgets.
A preset can be saved only with valid colors and measurements and at least 4.5:1 text contrast in both color modes. Elementor global values remain the foundation, and individual widget settings take priority.
Blueprints
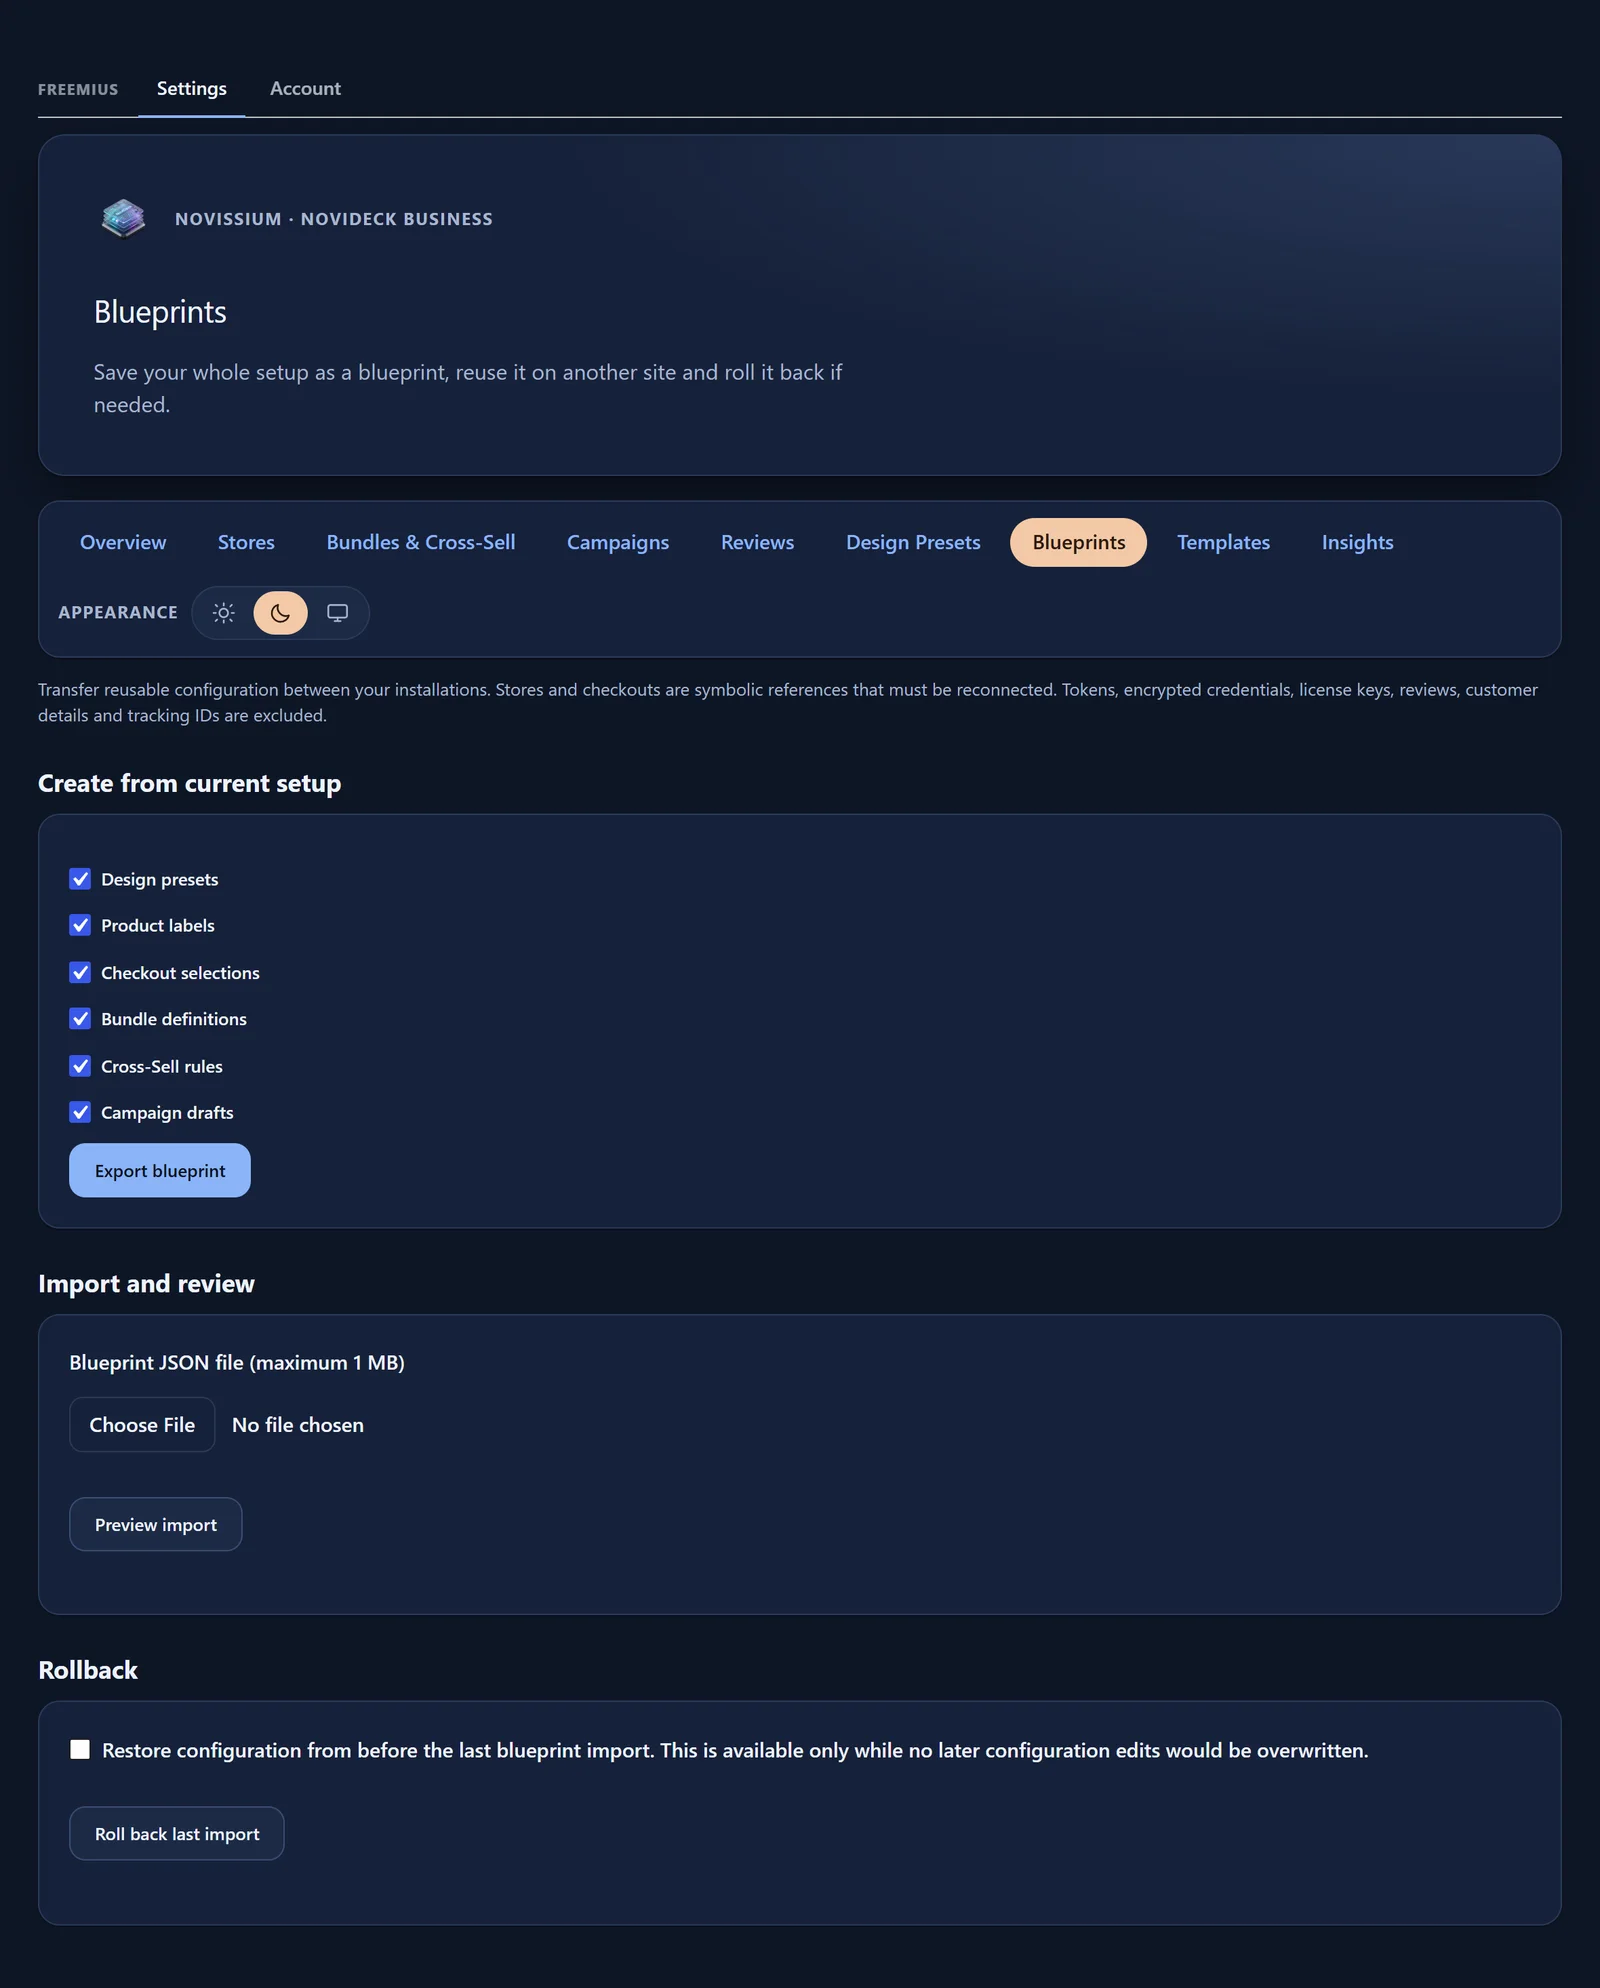
Blueprints transfer reusable configurations between installations you own.
Export a Blueprint:
- Open Novissium → Blueprints.
- Choose Create from current setup.
- Select the components you want to include.
- Click Export blueprint.
Import a Blueprint:
- On the destination installation, open Novissium → Blueprints.
- Select Blueprint JSON file (maximum 1 MB).
- Click Preview import.
- On Blueprint preview and mapping, complete Reconnect products, Reconnect plans, Reconnect checkout options and Reconnect checkout profiles as needed. Use Map to this website for each connection.
- Under Components and conflicts, choose Create copy, Skip or Replace selected for conflicts.
- If needed, choose Skip dependent components.
- Select Review mapping and changes.
- When the preview is correct, click Apply blueprint.
To undo the most recent import, use Rollback / Roll back last import. If an import fails, the previous configuration is retained.
Blueprints do not transfer API tokens, encrypted credentials, license keys, reviews, customer data or tracking IDs. Store and checkout connections are placeholders until you reconnect them.
Templates
Business Templates use the Elementor template library for layouts.
- Open Novissium → Templates.
- Save or inspect the layout in the Elementor template library.
- Export the template when you want to reuse it elsewhere.
- Manually transfer and import it on the other installation.
Templates do not use a separate account or cloud synchronization.
Reviews
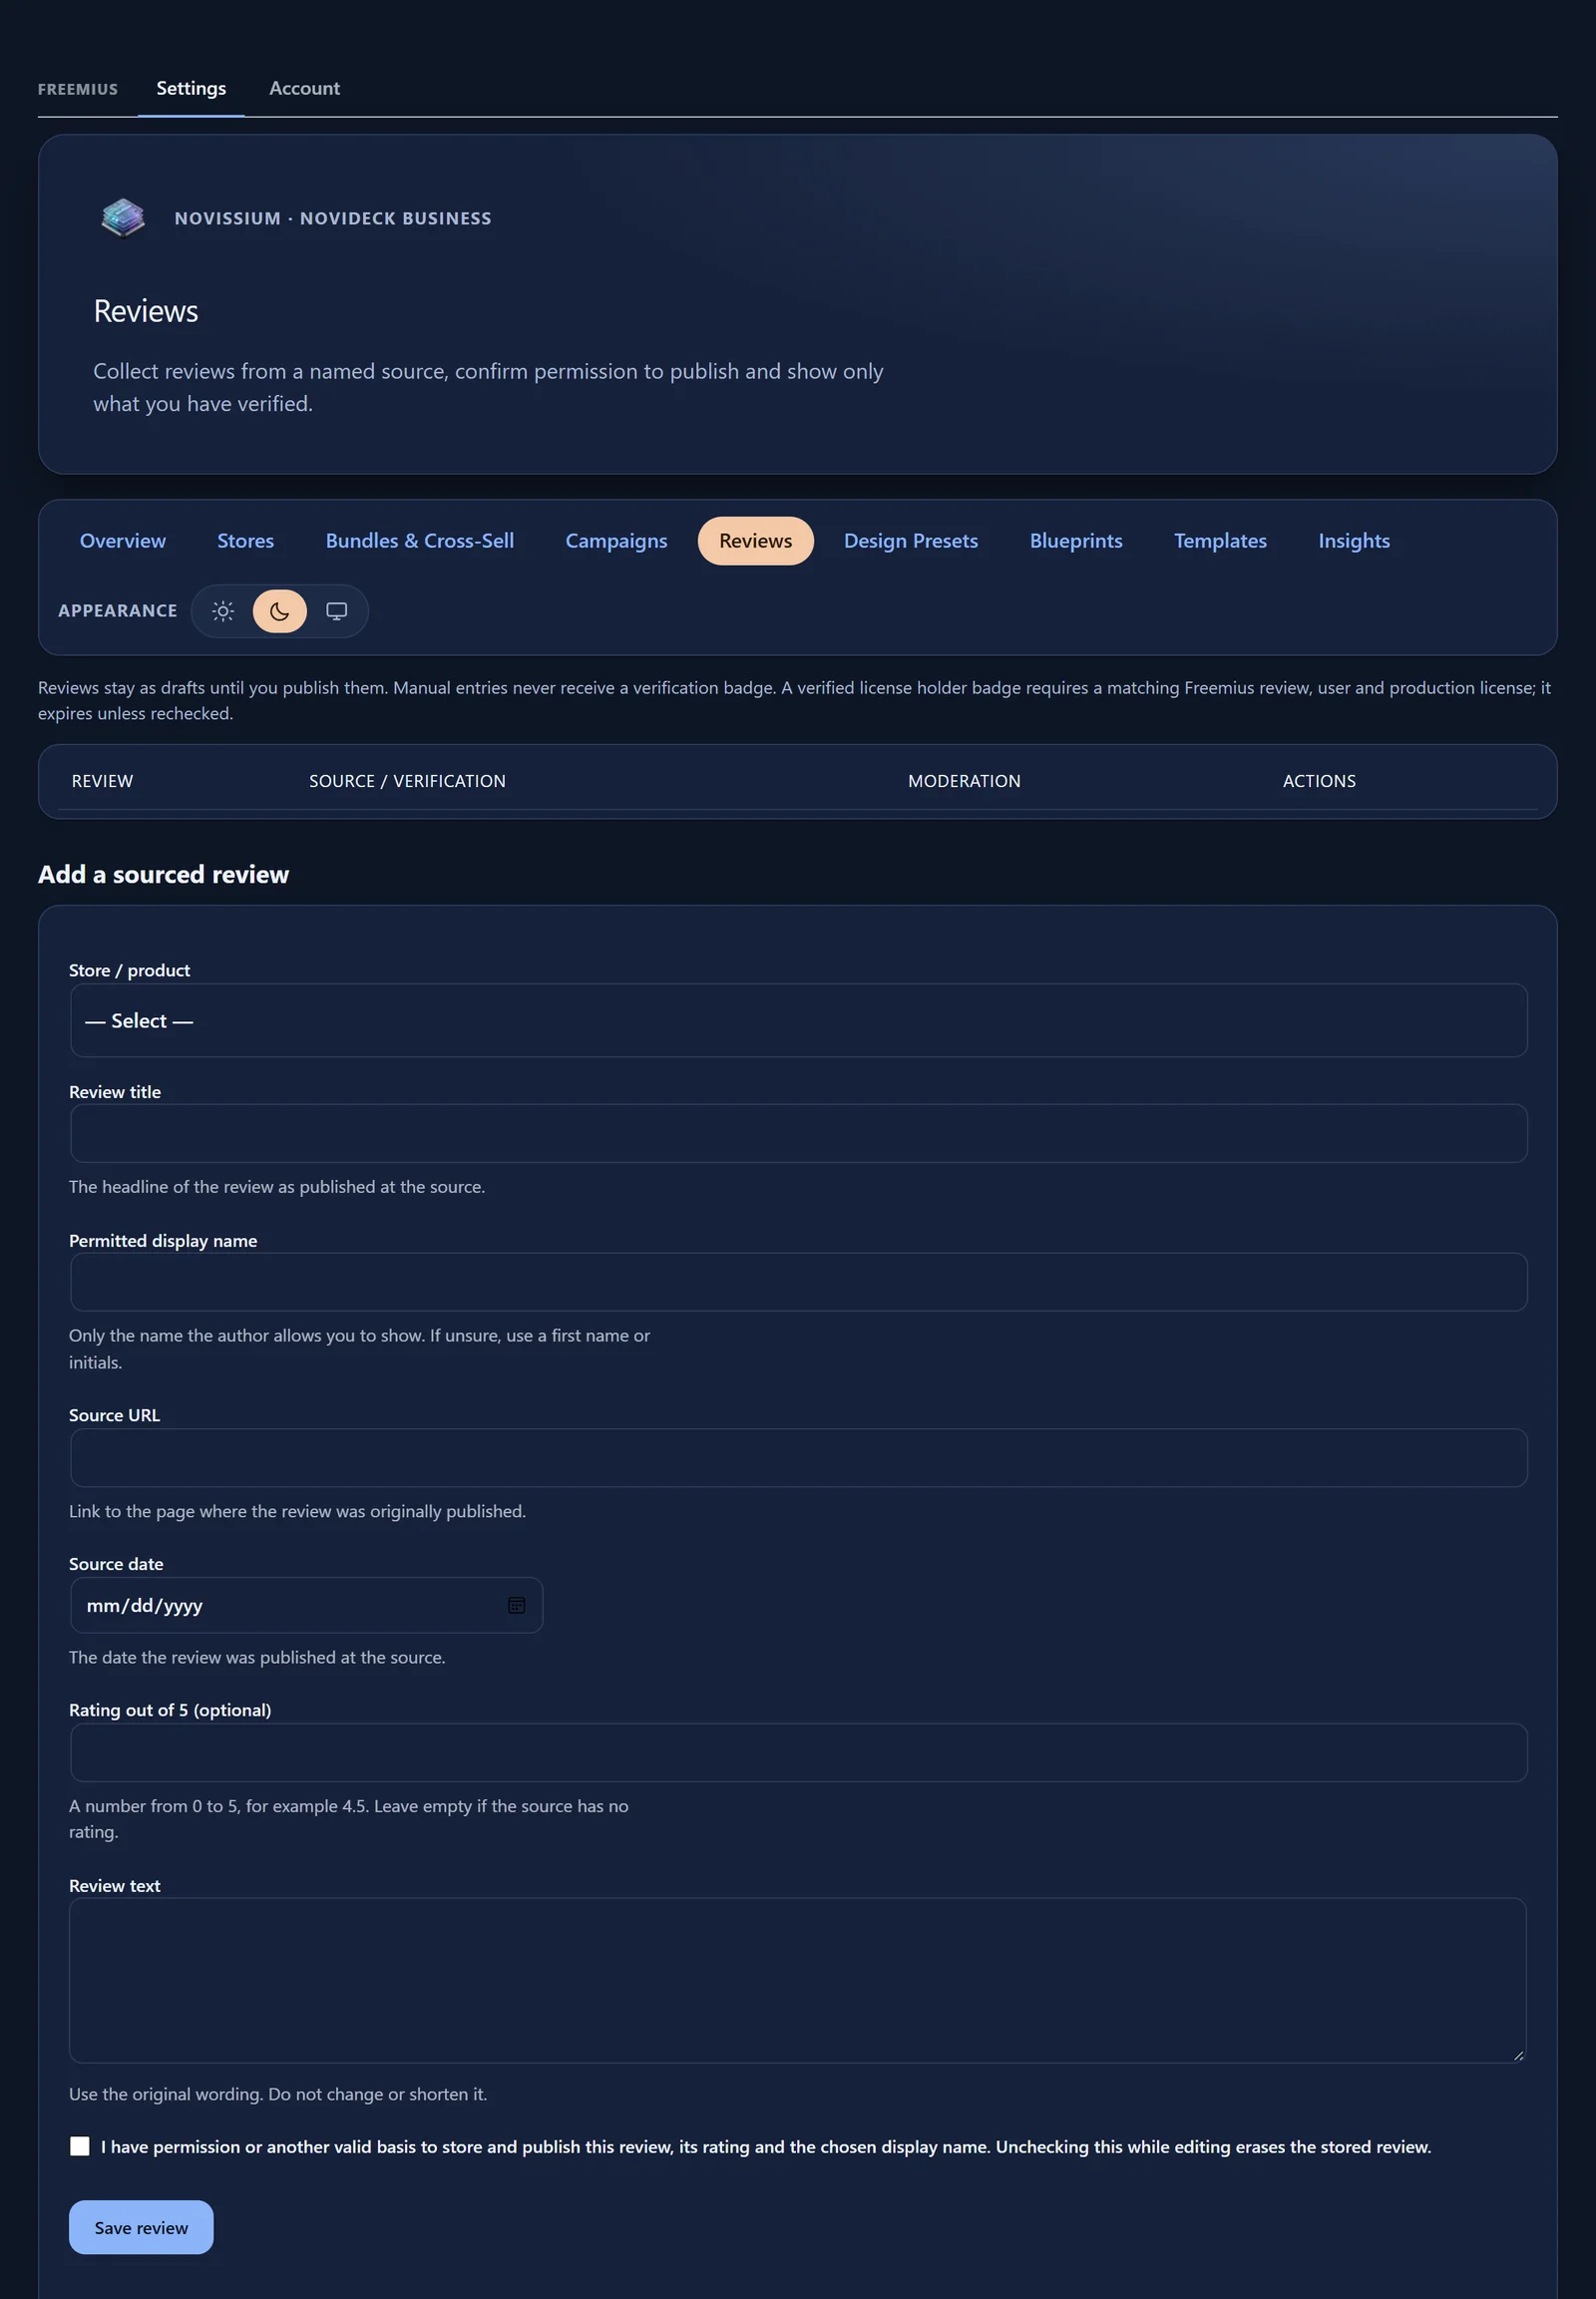
Use Novissium → Reviews to collect and publish product reviews.
- Open Reviews.
- Record or review a rating.
- Keep it as a draft until you are ready to publish it.
- Publish the rating when appropriate.
- Use Verified Reviews to display published reviews for the chosen product.
Manually entered reviews never receive a verified badge. A Verified license holder badge requires a matching Freemius review, a Freemius user and a production license. The badge expires if it is not checked again.
Insights / Settings
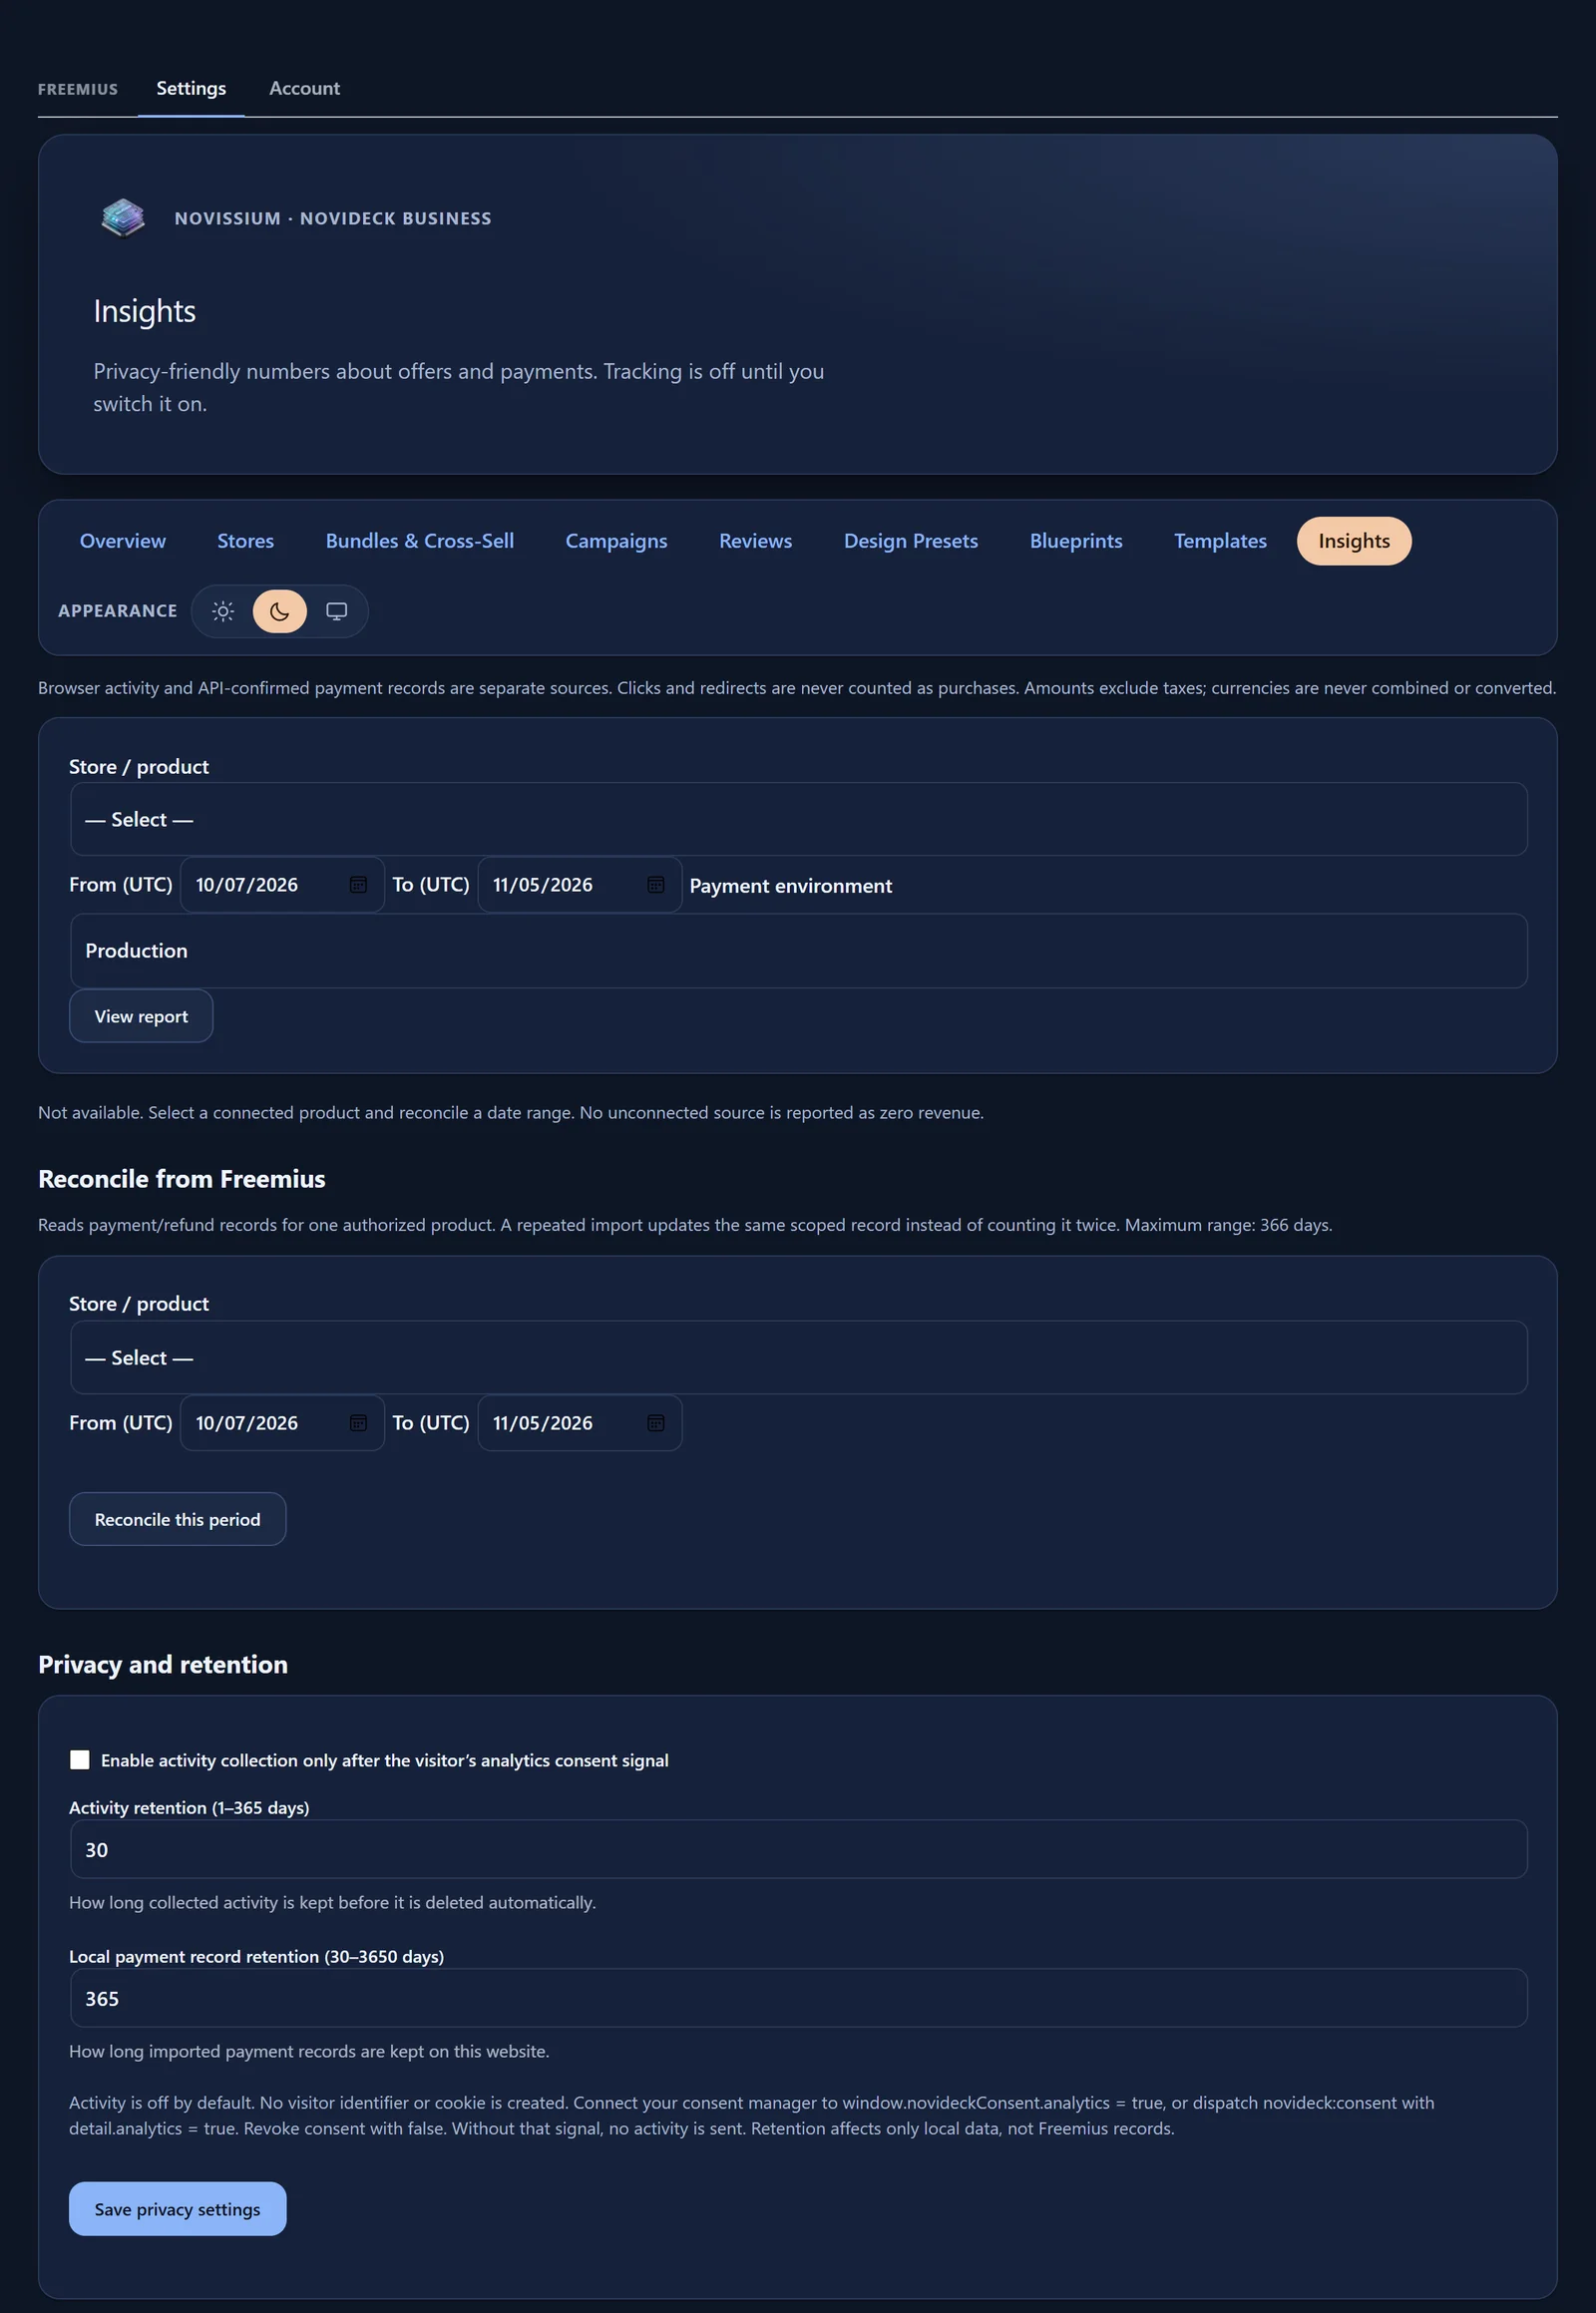
Insights / Settings is one menu item. Its page title is Conversion Insights. The page contains a report and a Privacy and retention section.
View a report:
- Open Novissium → Insights / Settings.
- Select Store / product.
- Set From (UTC) and To (UTC).
- Choose Payment environment: Production or Sandbox.
- Click View report.
- Read the table columns Event / record, Source, Count and Gross amount excluding tax.
- Review Campaign and offer attribution, including Campaign, Checkout offer, Bundle offer and Cross-sell offer, with Purchases, Revenue and Subscriptions.
- Use Export this report when you need the report outside NoviDeck.
Browser events are marked Not a payment. You can also use Reconcile from Freemius / Reconcile this period.
- Clicks and redirects are not counted as purchases.
- Monetary amounts exclude taxes.
- Amounts in different currencies are neither added together nor converted.
Privacy and retention:
- Under Privacy and retention, configure Enable activity collection only after the visitor’s analytics consent signal.
- Set Activity retention (1–365 days).
- Set Local payment record retention (30–3650 days).
- Choose Save privacy settings.
The page also provides Signed payment webhooks.
14. Check your page before publishing
- Confirm that the selected product or Store is correct.
- Confirm that each displayed offer uses the intended plan, billing option, website count and currency.
- Check the checkout action and any Checkout profile.
- Test connected Selection Groups where you use them.
- Review light and dark styling where relevant.
- Test layouts on desktop and mobile.
- For Business, check that campaigns and reviews have the intended publication state.
15. Troubleshooting
I cannot find a widget
Check which edition your Freemius license unlocks. Standard has 10 widgets, Pro 15 and Business 20. Confirm Elementor and NoviDeck are active.
A bundle has no available prices or options
Open the bundle’s source product in the synchronized Store. Synchronize the product, then check the available Freemius-confirmed combinations again.
A Business widget does not use my Pro master selection
Business widgets have independent Source settings. Select the Store and product or offer directly in the Business widget.
My Checkout profile does not allow the widget’s selected offer
Check whether the profile permits widget overrides. If you want the widget to retain its own Source selection, enable the appropriate option and use a profile that allows overrides.
I cannot save a Design Preset
Check the color and measurement values. Text must meet at least 4.5:1 contrast in both light and dark modes.
A campaign time is rejected
The time may be ambiguous during a daylight-saving time change. Enter the time in UTC.
A review does not show as verified
Manually entered reviews cannot receive a verified badge. A verified license-holder badge requires matching Freemius evidence and a current verification check.
A click appears in activity, but no purchase appears
Clicks and redirects measure browser activity. Only payments confirmed by the API count as payments.
For more answers, open the FAQ.
16. Support
Email .
Include your NoviDeck edition, the widget or administration section, and a short description of what you expected and what happened. Do not send passwords, API tokens or license keys.
Back to: NoviDeck Help Center
Quick answers: NoviDeck FAQ
